The purpose of this document is to walkthrough the steps involved in configuring Authoriz.net as the payment gateway provider in C3. The document talks about changing a few application level settings in Authorize.net portal. Partners are requested to Perform the actions as below mentioned. The document also covers the steps that a Partner can do to validate the integration by performing a test charge against the credit card.
Prerequisites
It is assumed that you have an account with Authorize.net. C3 requires the following Authorize.net account details for the integration to work properly
- API Login Id
- Transaction Key
- Enabled transaction detail api
Please follow the below steps to obtain the required details :
- Launch the browser and navigate to https://www.authorize.net/
API Login Id
- Navigate to : Account->Settings->Api Credentials & Keys
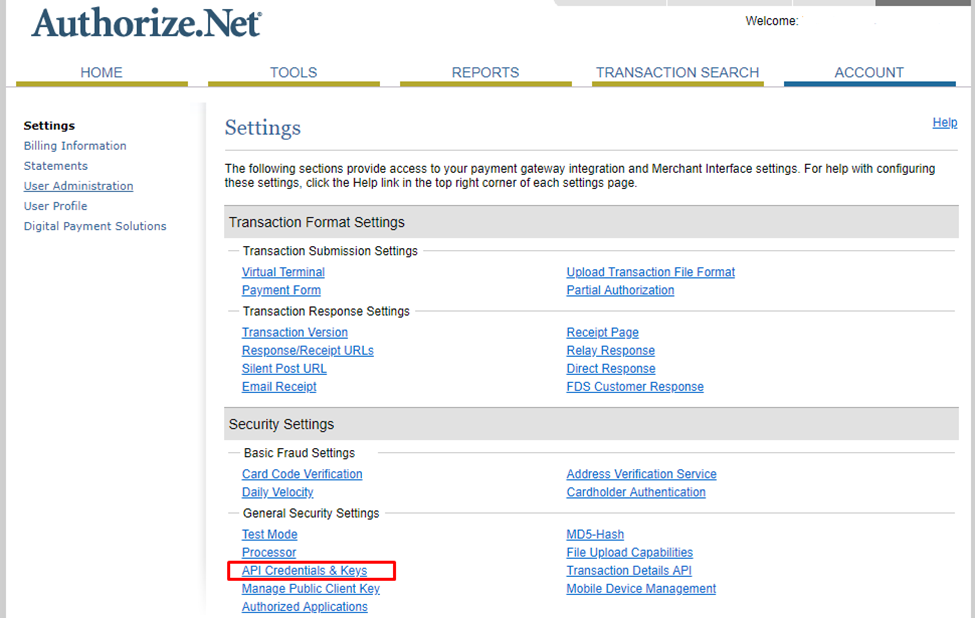
- API Credentials & Keys will have the API Login ID as shown below.
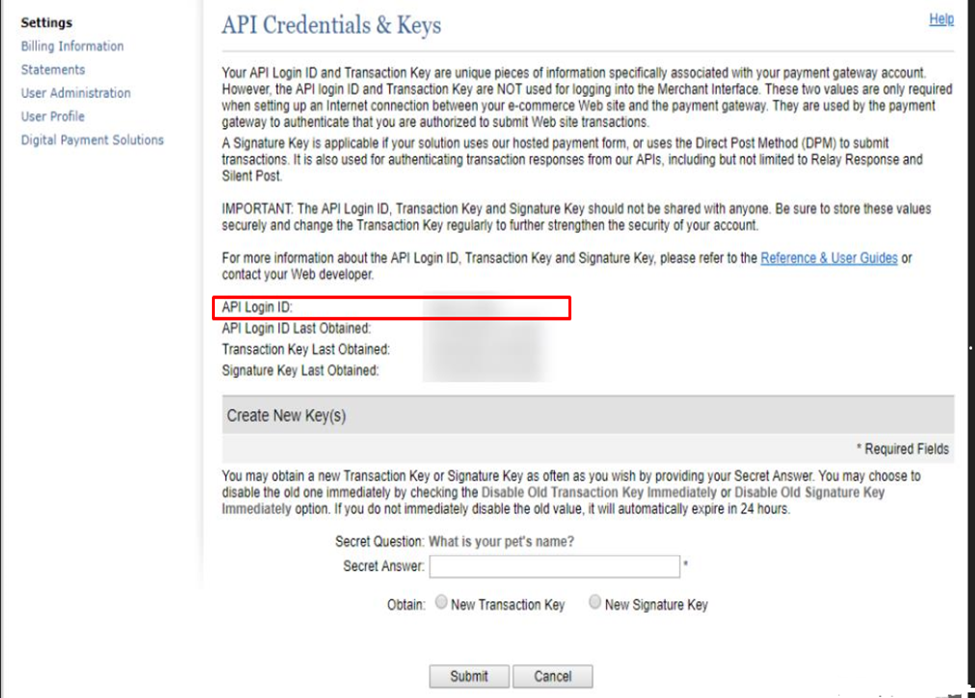
Generate Signature Key
- Navigate to: Account->Settings->Api Credentials & Keys
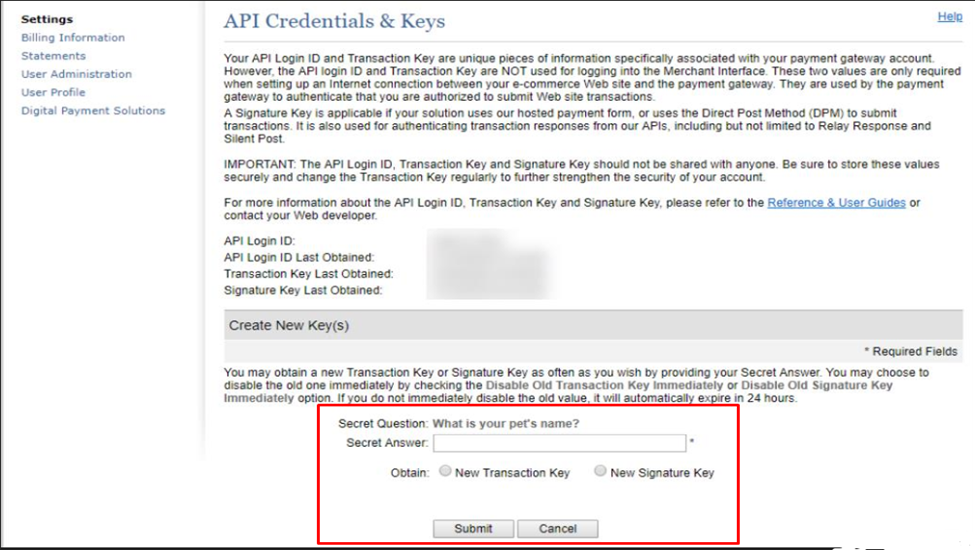
If you do not have the Signature Key with you can generate a new one as mentioned above, Security answer is “Simon” by default.
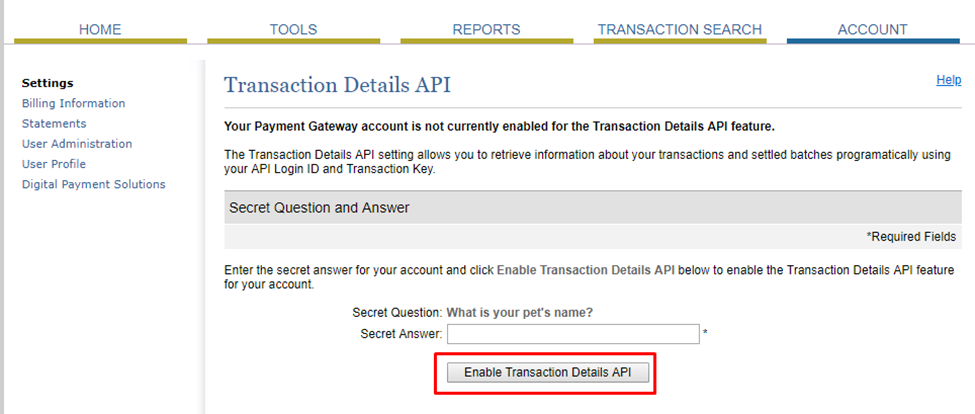
Enable Transaction Detail API
- Navigate to: Account->Settings->Transaction Details API
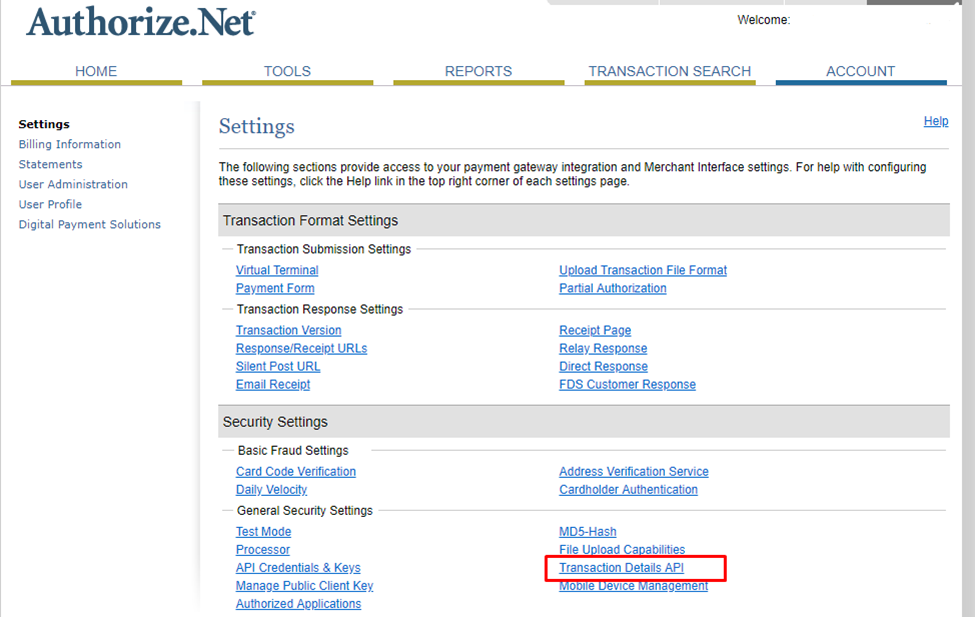
- Click on the Transaction detail api, It will lead you to the following screen. Enable the transaction Details API from here. The Default secret is “Simon”.
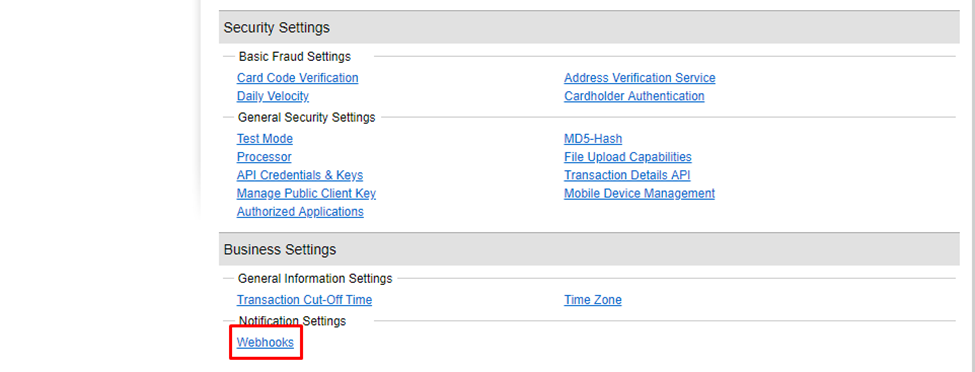
Configure Webhook
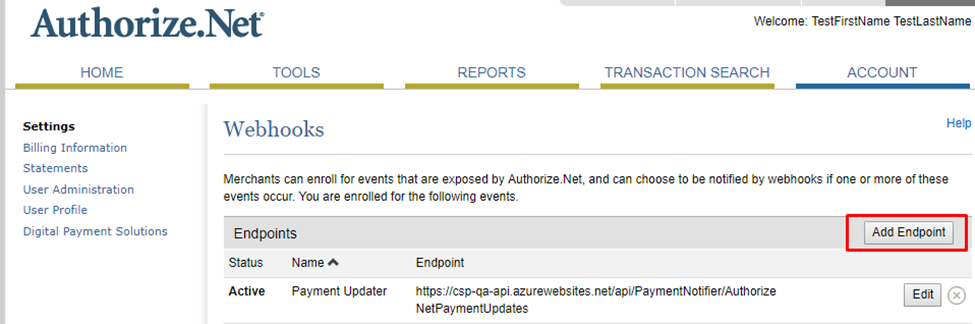
- Navigate to: Account->Settings->Webhooks (scroll to the bottom to find the Webhooks option)
- Click on Add Endpoint option
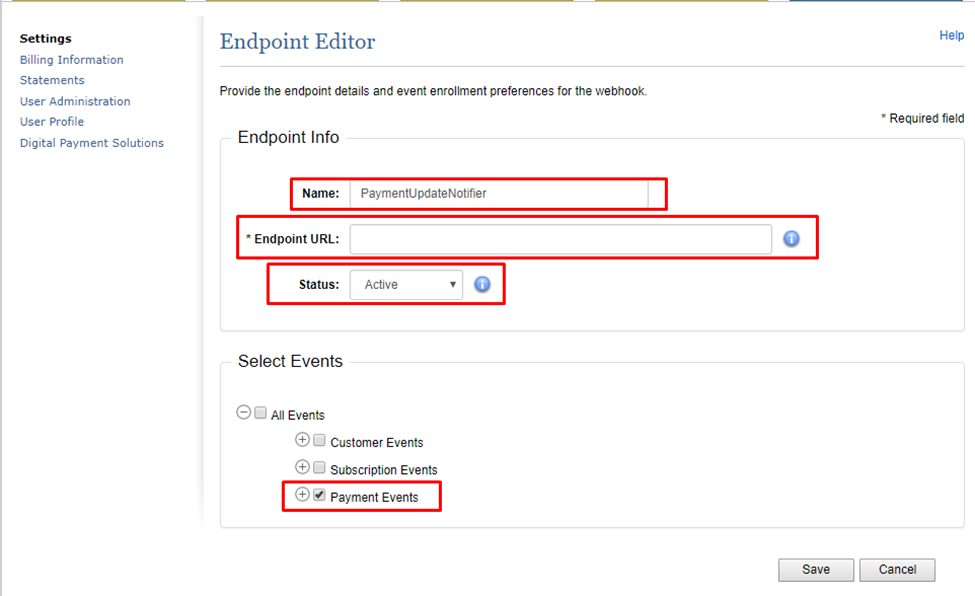
Give the Endpoint a Name, make the Status as Active and select all the Payment Events. For the Endpont URL : https://contoso-prod-api.azurewebsites.net/api/PaymentNotifier/AuthorizeNetPaymentUpdates
Onboard a Authorize.net customer to C3
Here are the steps to onboard an existing stripe customer.
Note: A test customer by name Contoso Market is considered for illustration purposes
-
Log on to C3 (C3 team should have communicated the details of the login / email that is given Partner Admin rights to the portal)
-
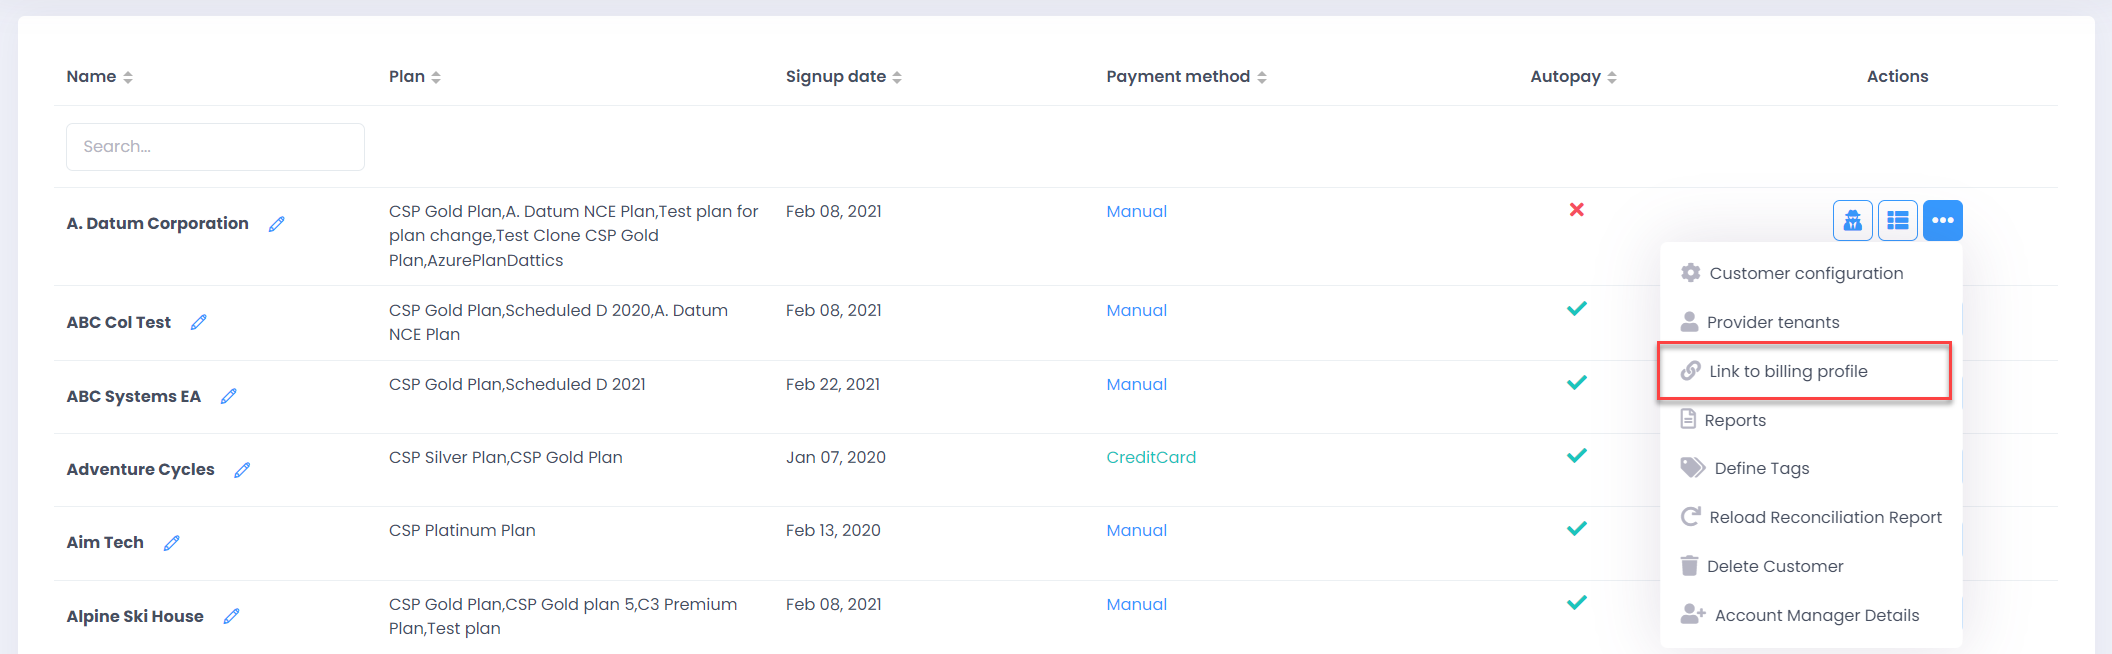
Click Customers in the menu on the left
-
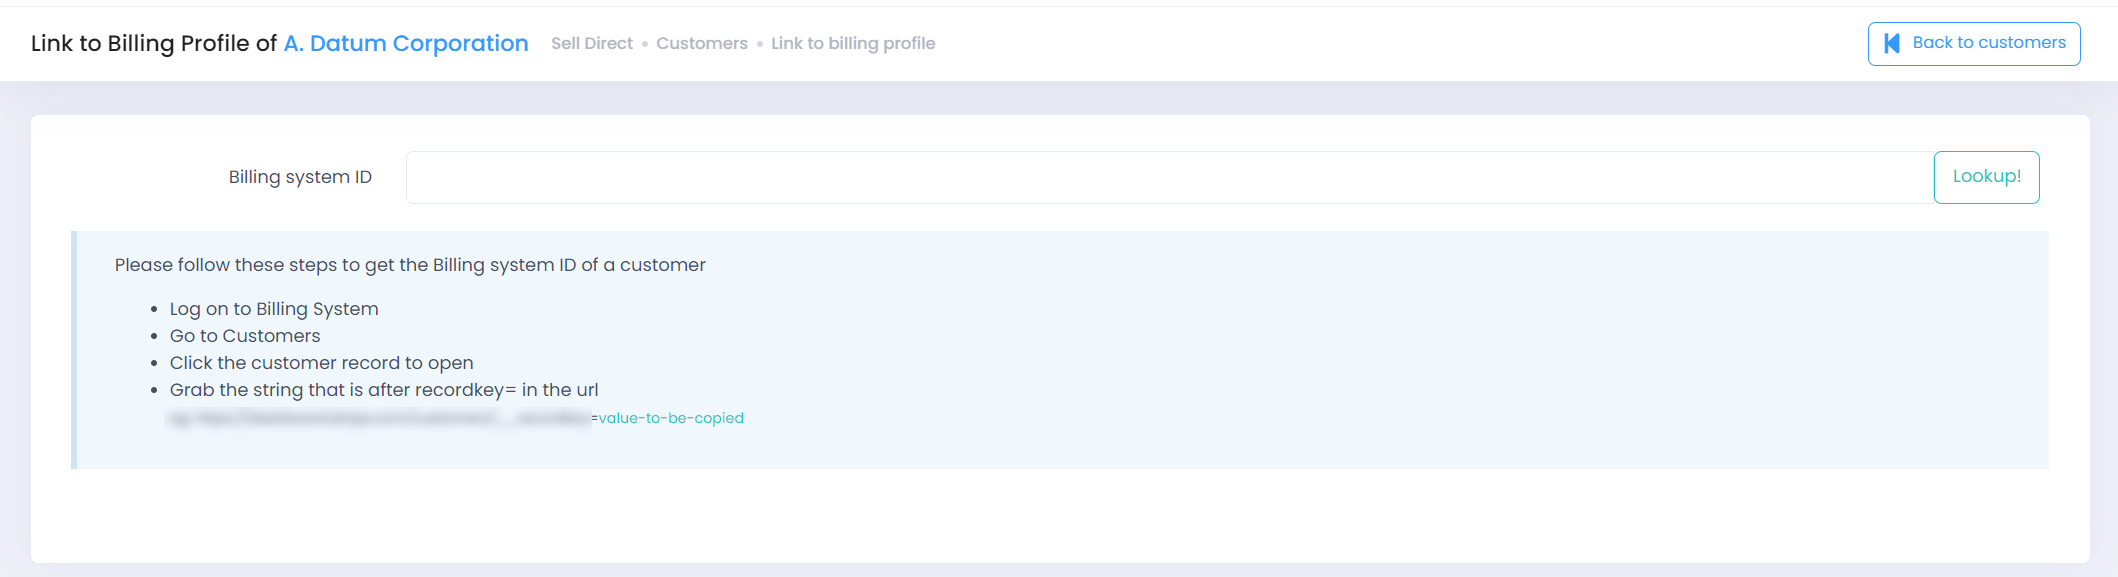
Redirect to “Link to Billing Profile” under Customer Settings.
-
The the following screen will become visible for onboarding Stripe customer using Billing System ID.
Adding payment profile
-
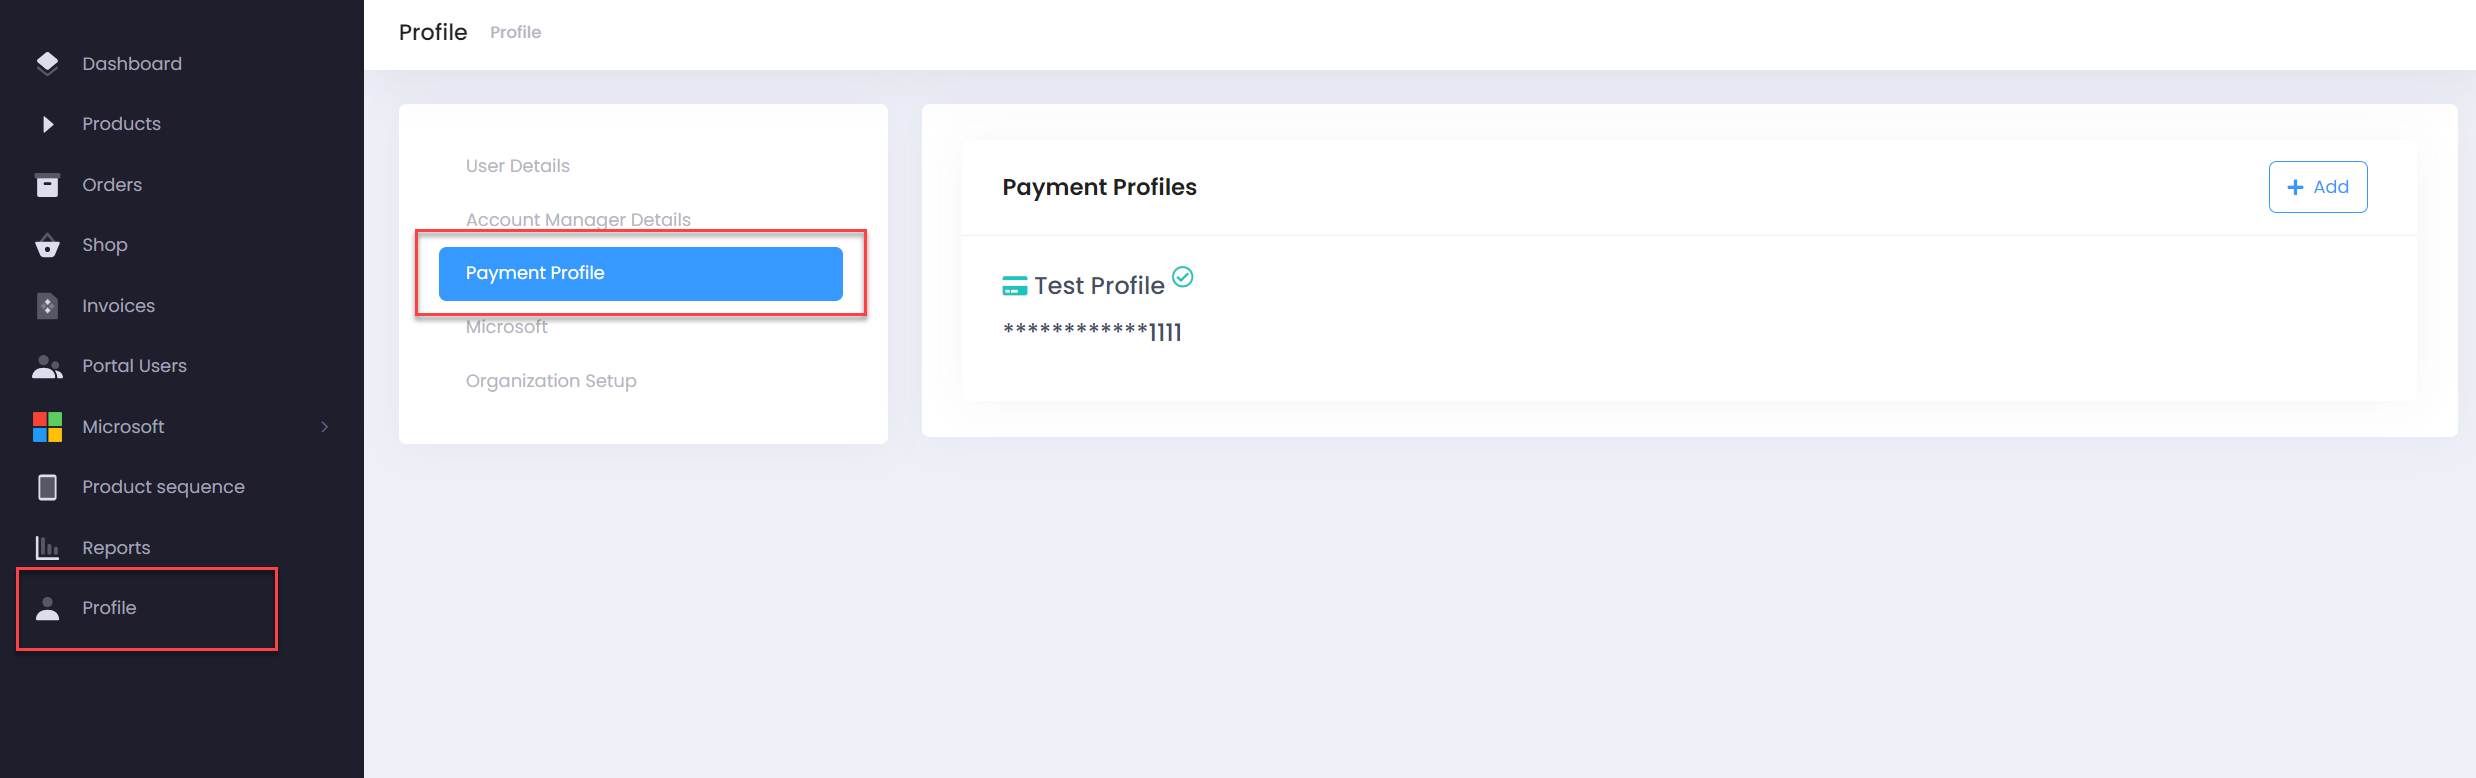
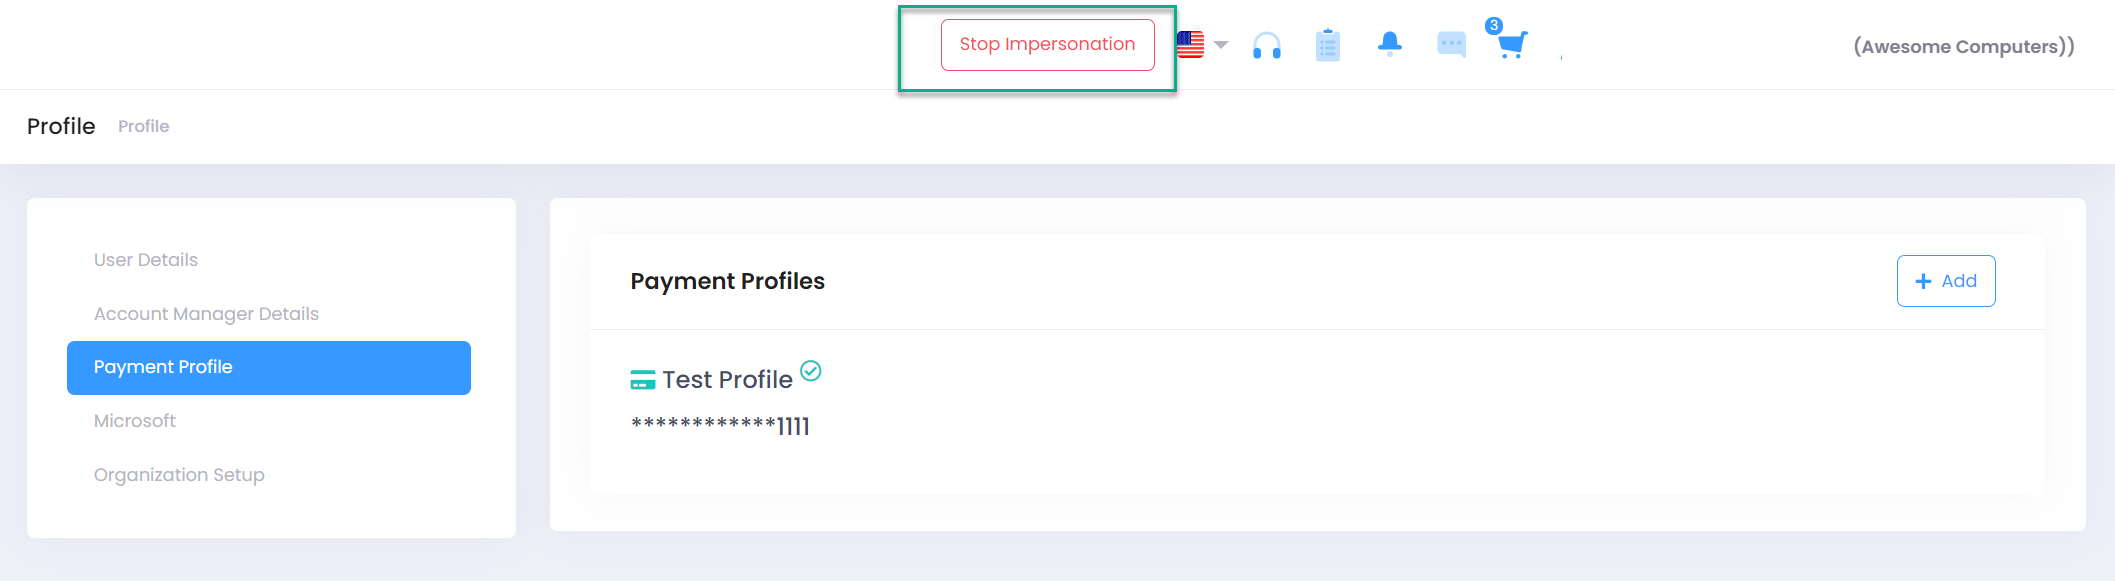
Impersonate Customer

-
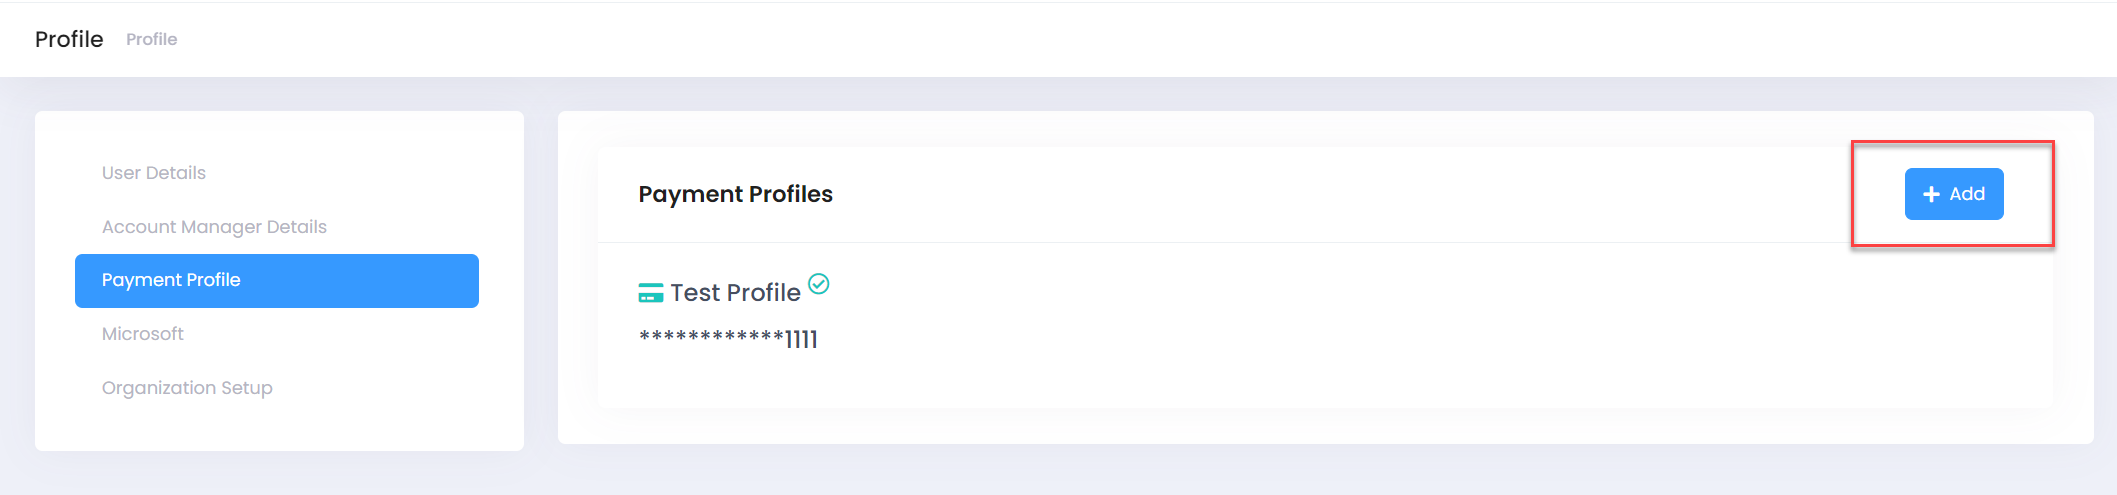
Click Profile in the menu on the left to look at the payment profile of the customer to ensure that it is valid
-
Payment method details can be updated by clicking on Add button and providing new details on the form that follows
-
Switch back to Partner side by clicking on Stop Impersonation button available on top bar.
-
Under Customer Settings, select the “Customer Payments” option.
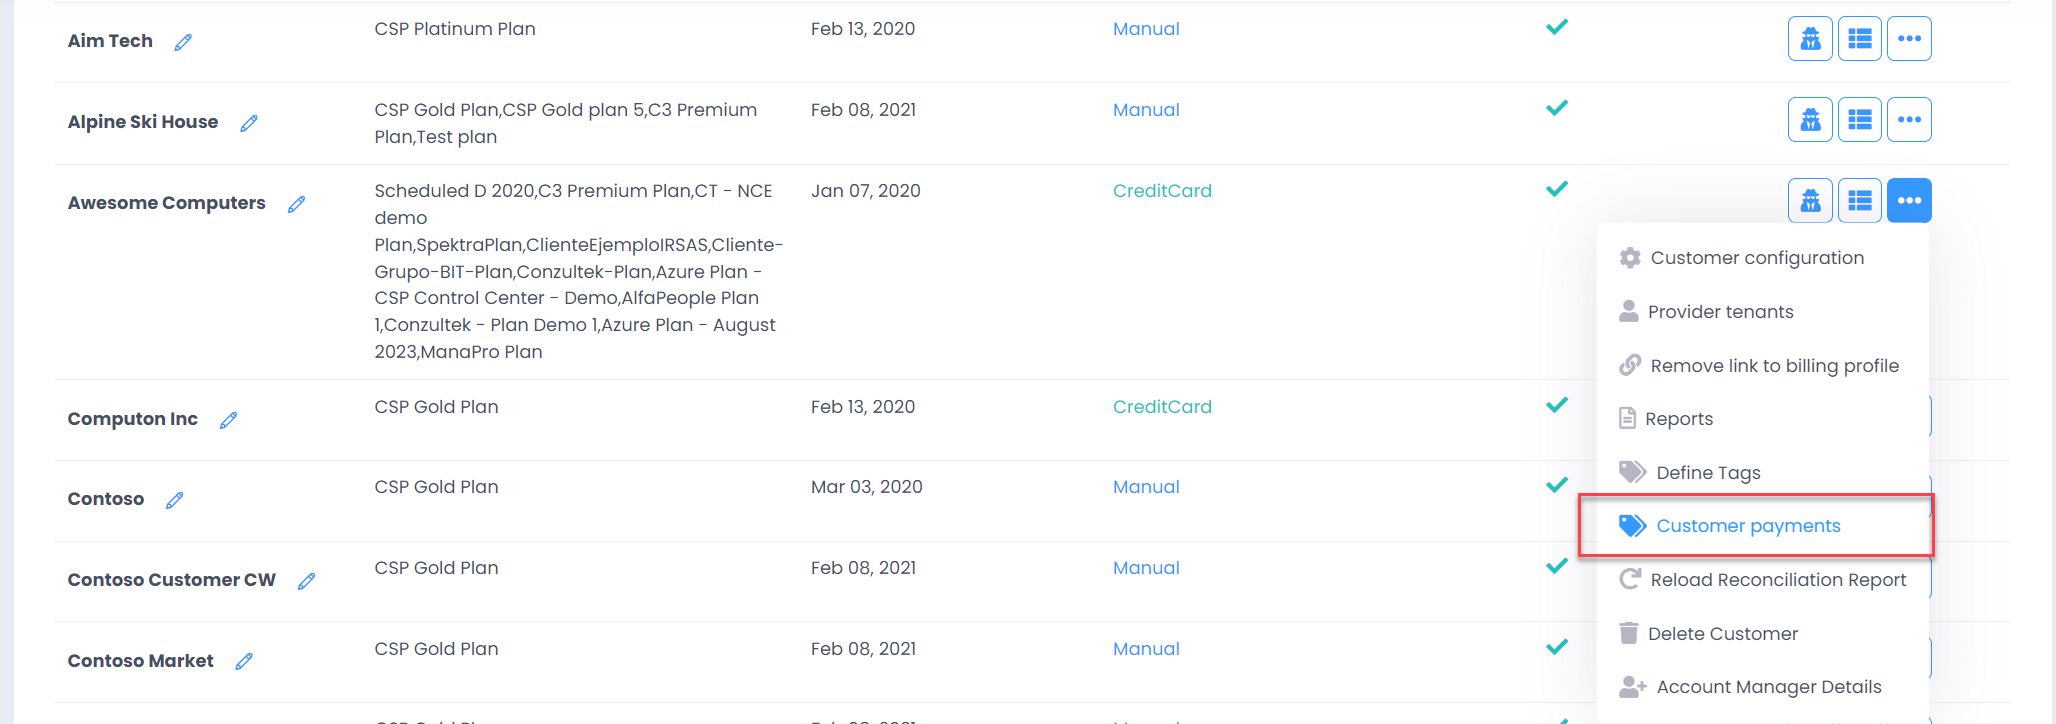
-
Click the “Test Charge Button” to initiate a test charge of $1 against customer payment profile
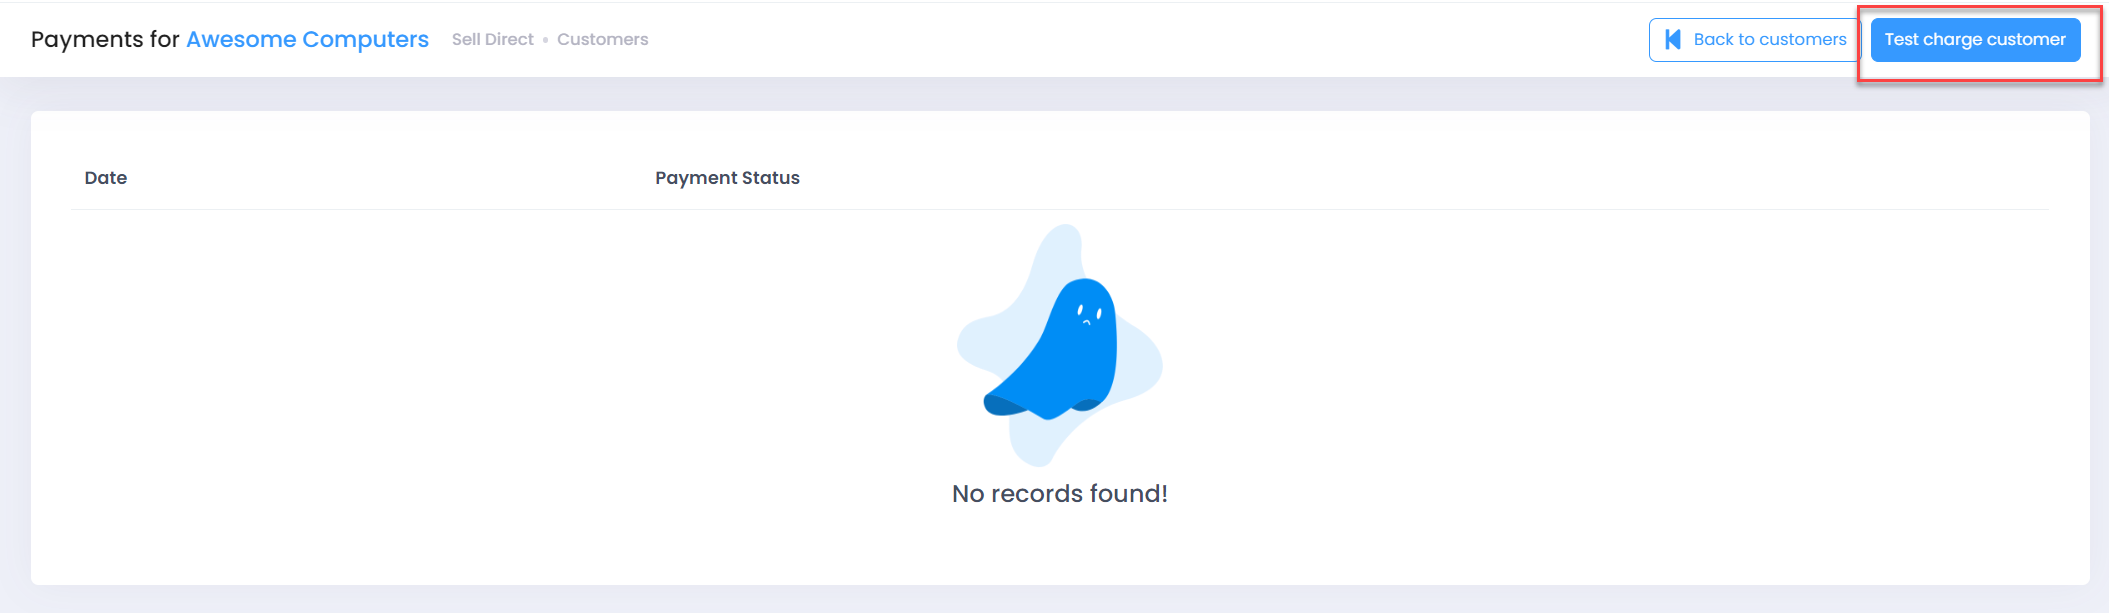
-
Give it a couple of minutes and come back to this screen to view the status of the transaction