Purpose of the document
The purpose of this document is to walkthrough the steps involved in configuring Stripe in C3. Partners are requested to provide the details as explained in further sections.
Prerequisites
It is assumed that you have an account with Stripe and is enabled for payment transactions against real credit cards. C3 requires the Stripe API key for the integration to work properly. Please follow the below steps to obtain the API key from Stripe
- Log on to Stripe
- Click Developers on the top right corner and then redirect to Api Keys tab.
- Click Reveal live key token to get the secret key, as illustrated in the below screenshot
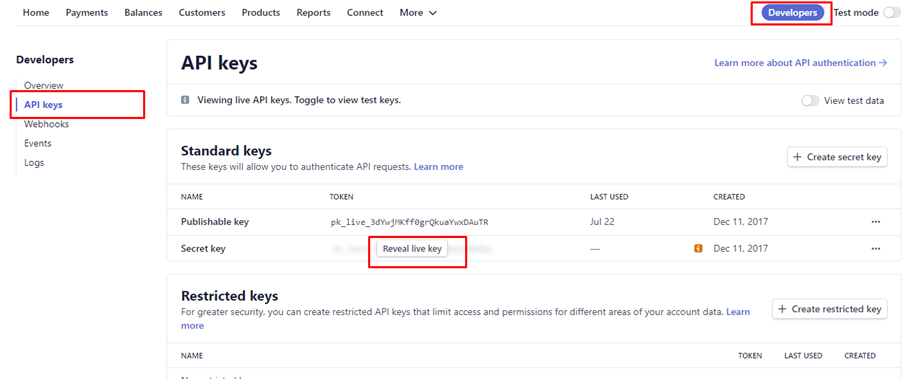
Please share the secret key with C3 team during the call in order to update the C3 application to work with Stripe
Configure Stripe to notify C3 about payment status
- The following are the steps to configure Stripe to call C3 API to publish the status of a payment transaction:
- Log on to Stripe
- Select the Developers option from top right corner then redirect to Api Keys tab.
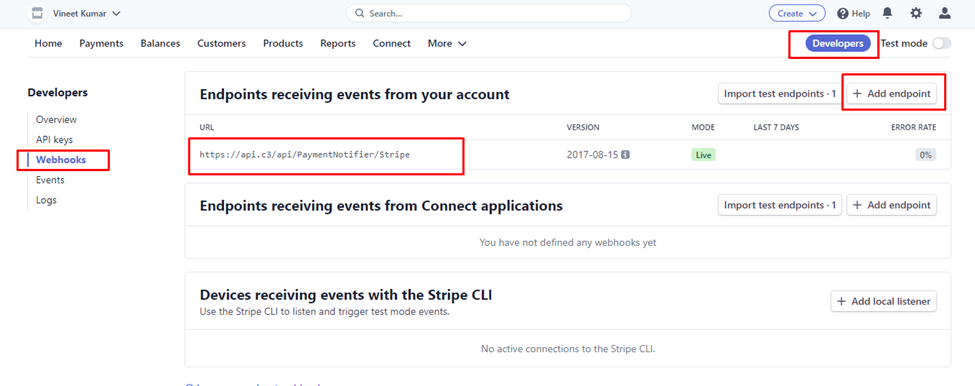
- Select Webhook tab from the left-hand side provided options.
- Existing webhooks will be listed here.
-
Click Add endpoint button as shown in the above picture.
-
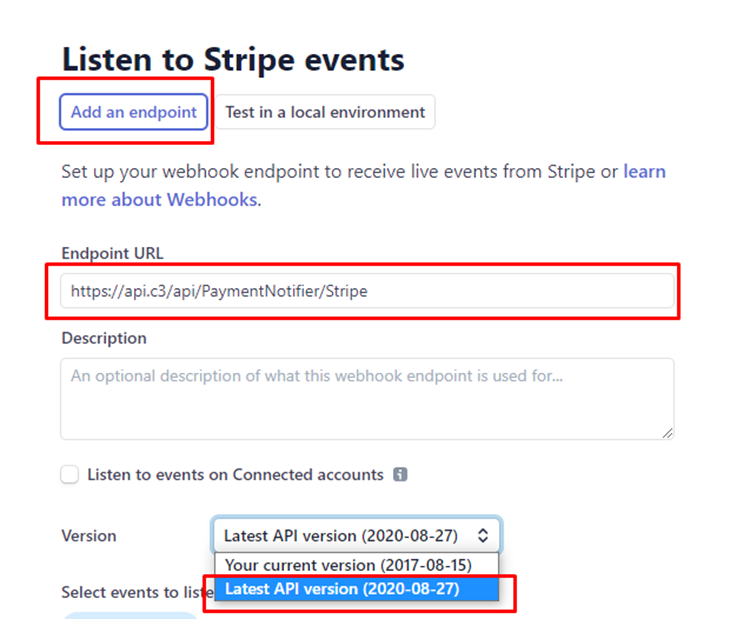
Provide the details as shown here
-
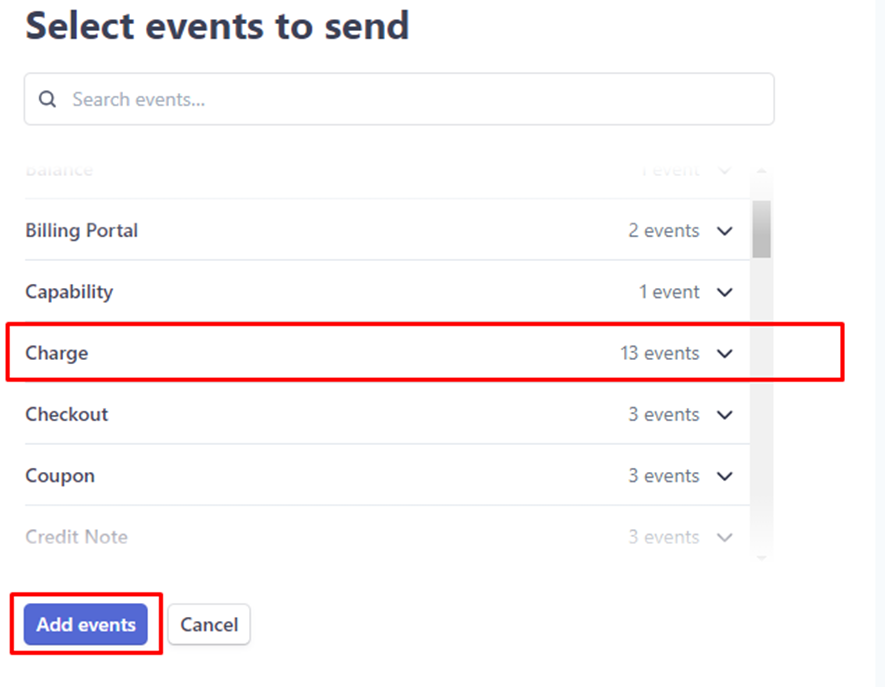
Add all the charge events:
-
URL to be called - https://contoso-c3-api.azurewebsites.net/c3/api/PaymentNotifier/Stripe
Onboard a stripe customer to C3
Here are the steps to onboard an existing stripe customer.
Note: A test customer by name Contoso Market is considered for illustration purposes
-
Log on to C3 (C3 team should have communicated the details of the login / email that is given Partner Admin rights to the portal)
-
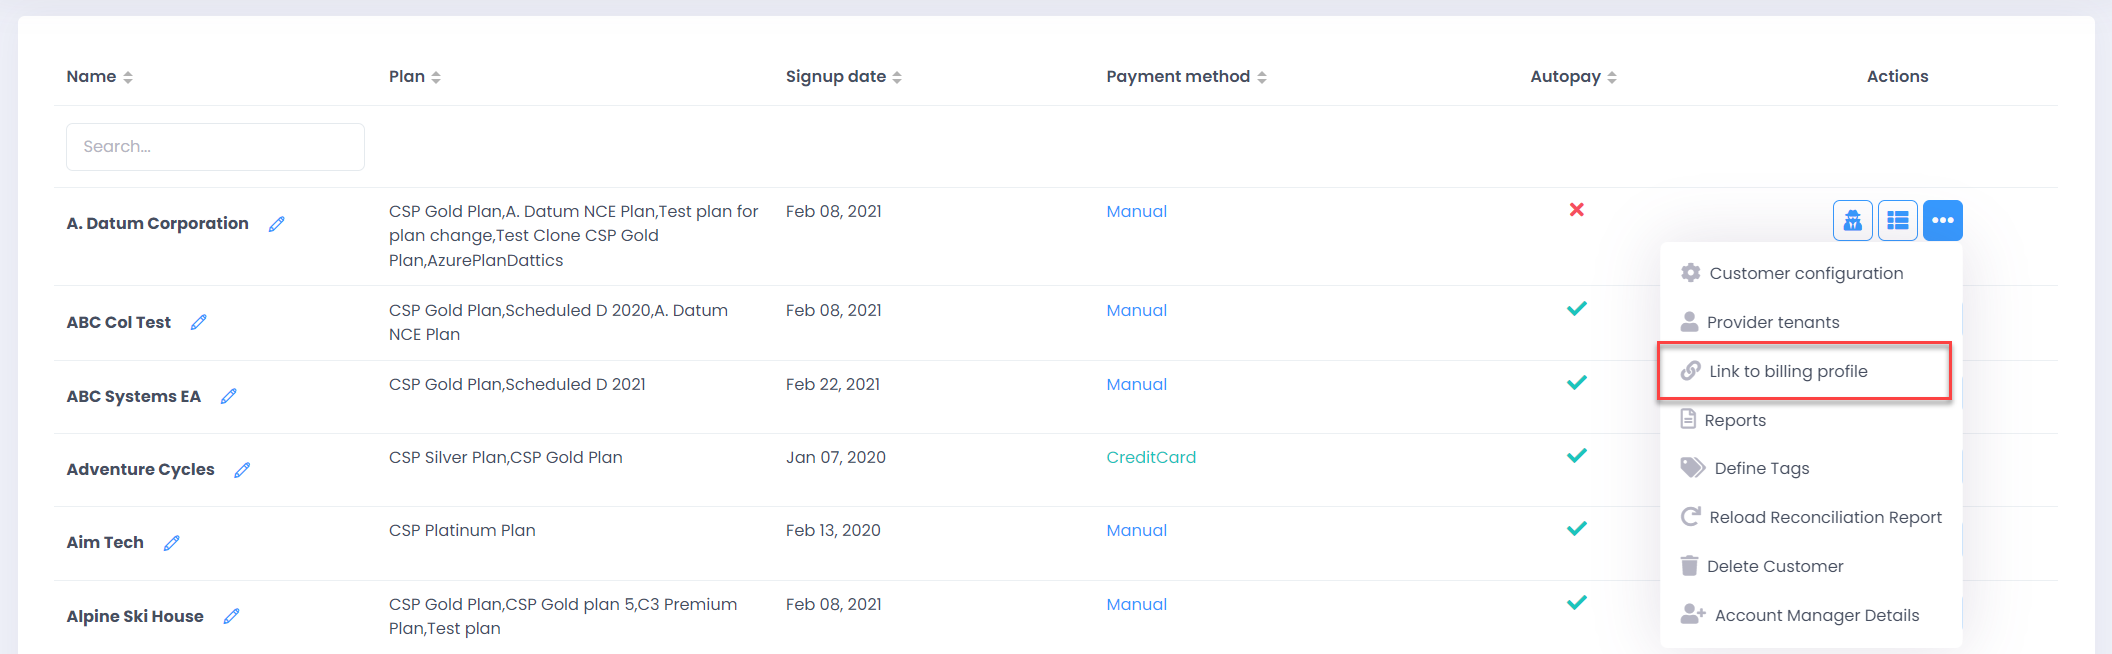
Click Customers in the menu on the left
-
Redirect to “Link to Billing Profile” under Customer Settings.
-
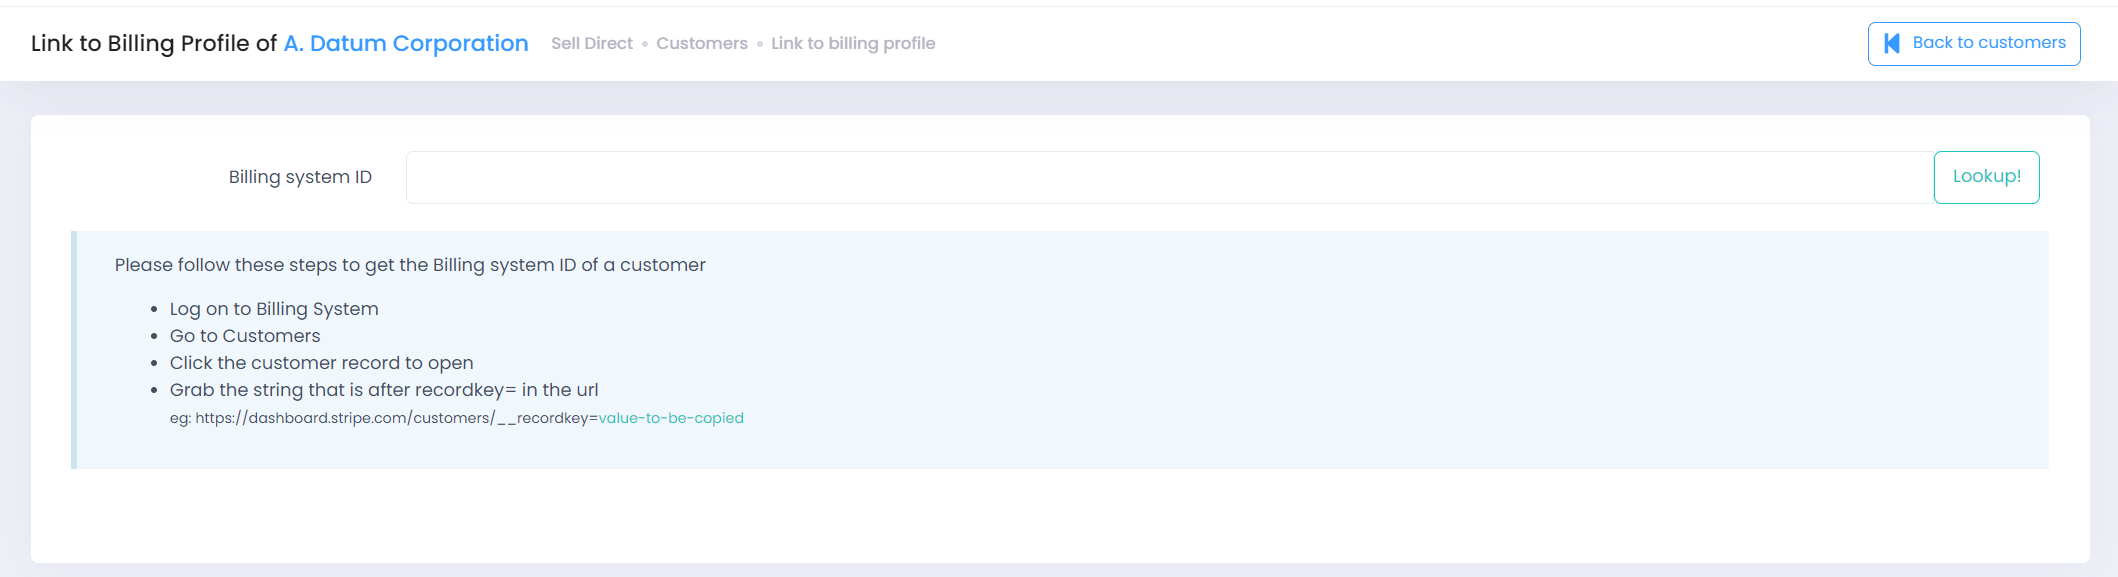
The the following screen will become visible for onboarding Stripe customer using Billing System ID.
-
You can obtain the Stripe reference string of a customer as follows:
- Log on Stripe
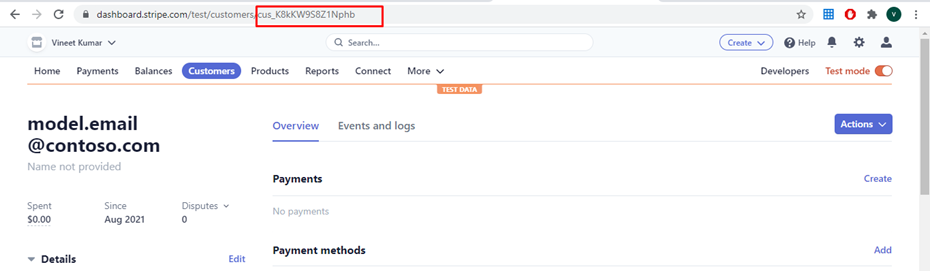
- Click Customers from top bar and click on a customer in the list to view the details

- Copy the segment in the URL as illustrated here:
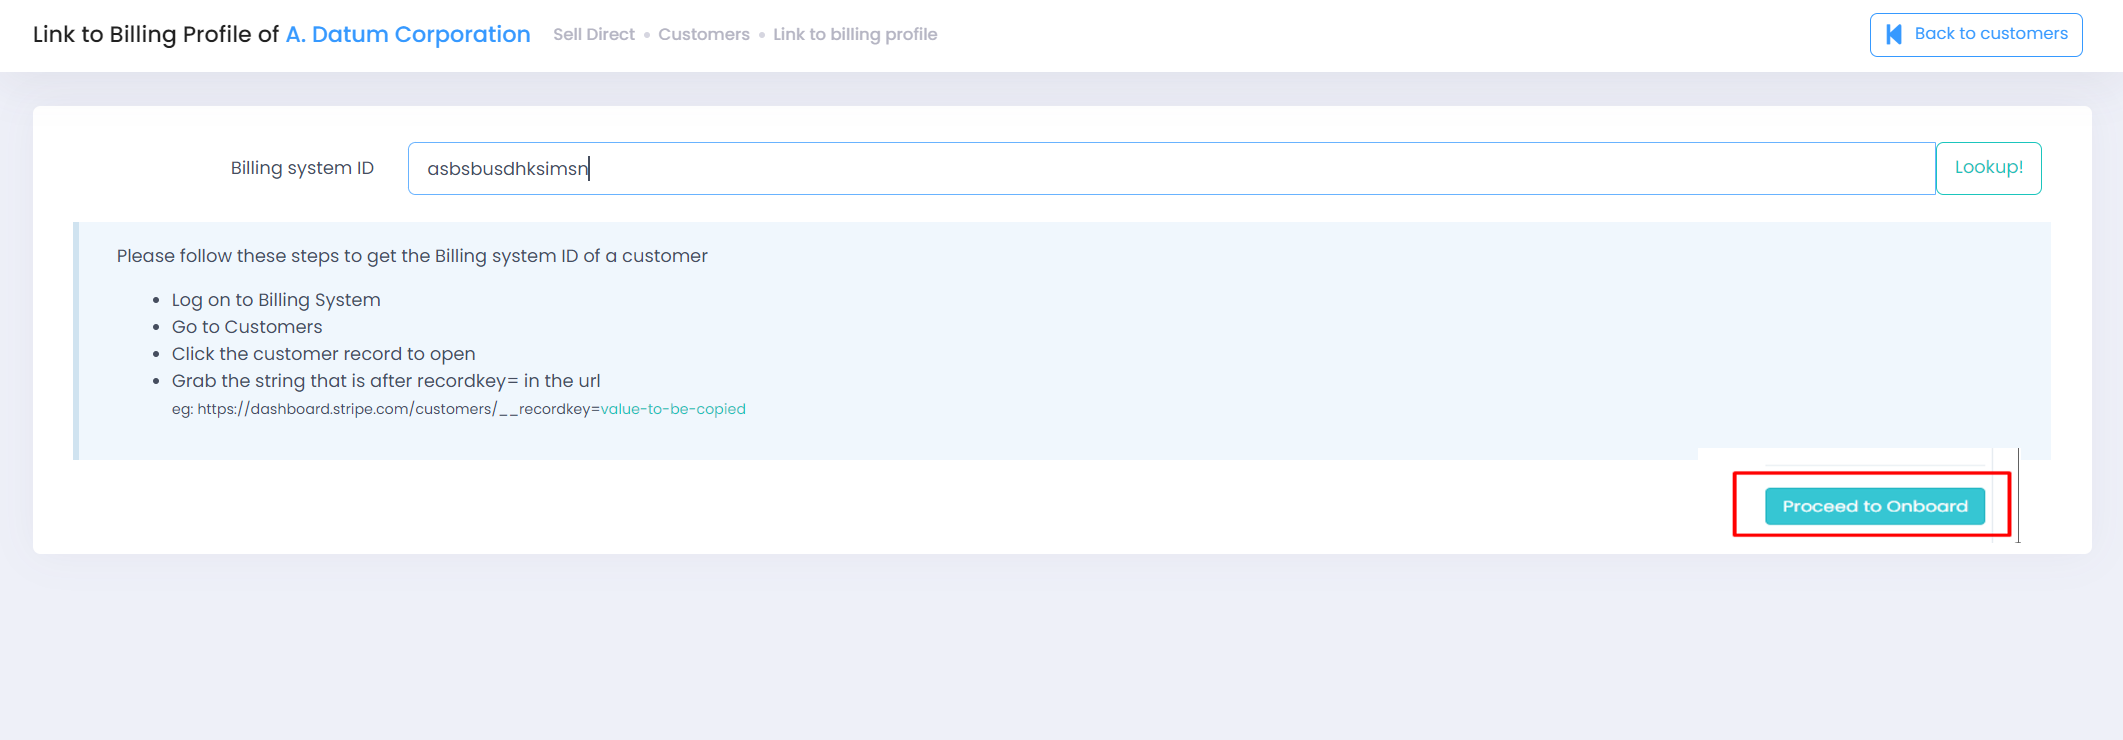
- Enter the Stripe reference number and perform a look up. This look up will be against Stripe and C3 would come back with confirmation of the customer availability. Click “Proceed to Onboard” to complete the onboarding process.
Adding payment profile
-
Impersonate Customer

-
Click Profile in the menu on the left to look at the payment profile of the customer to ensure that it is valid
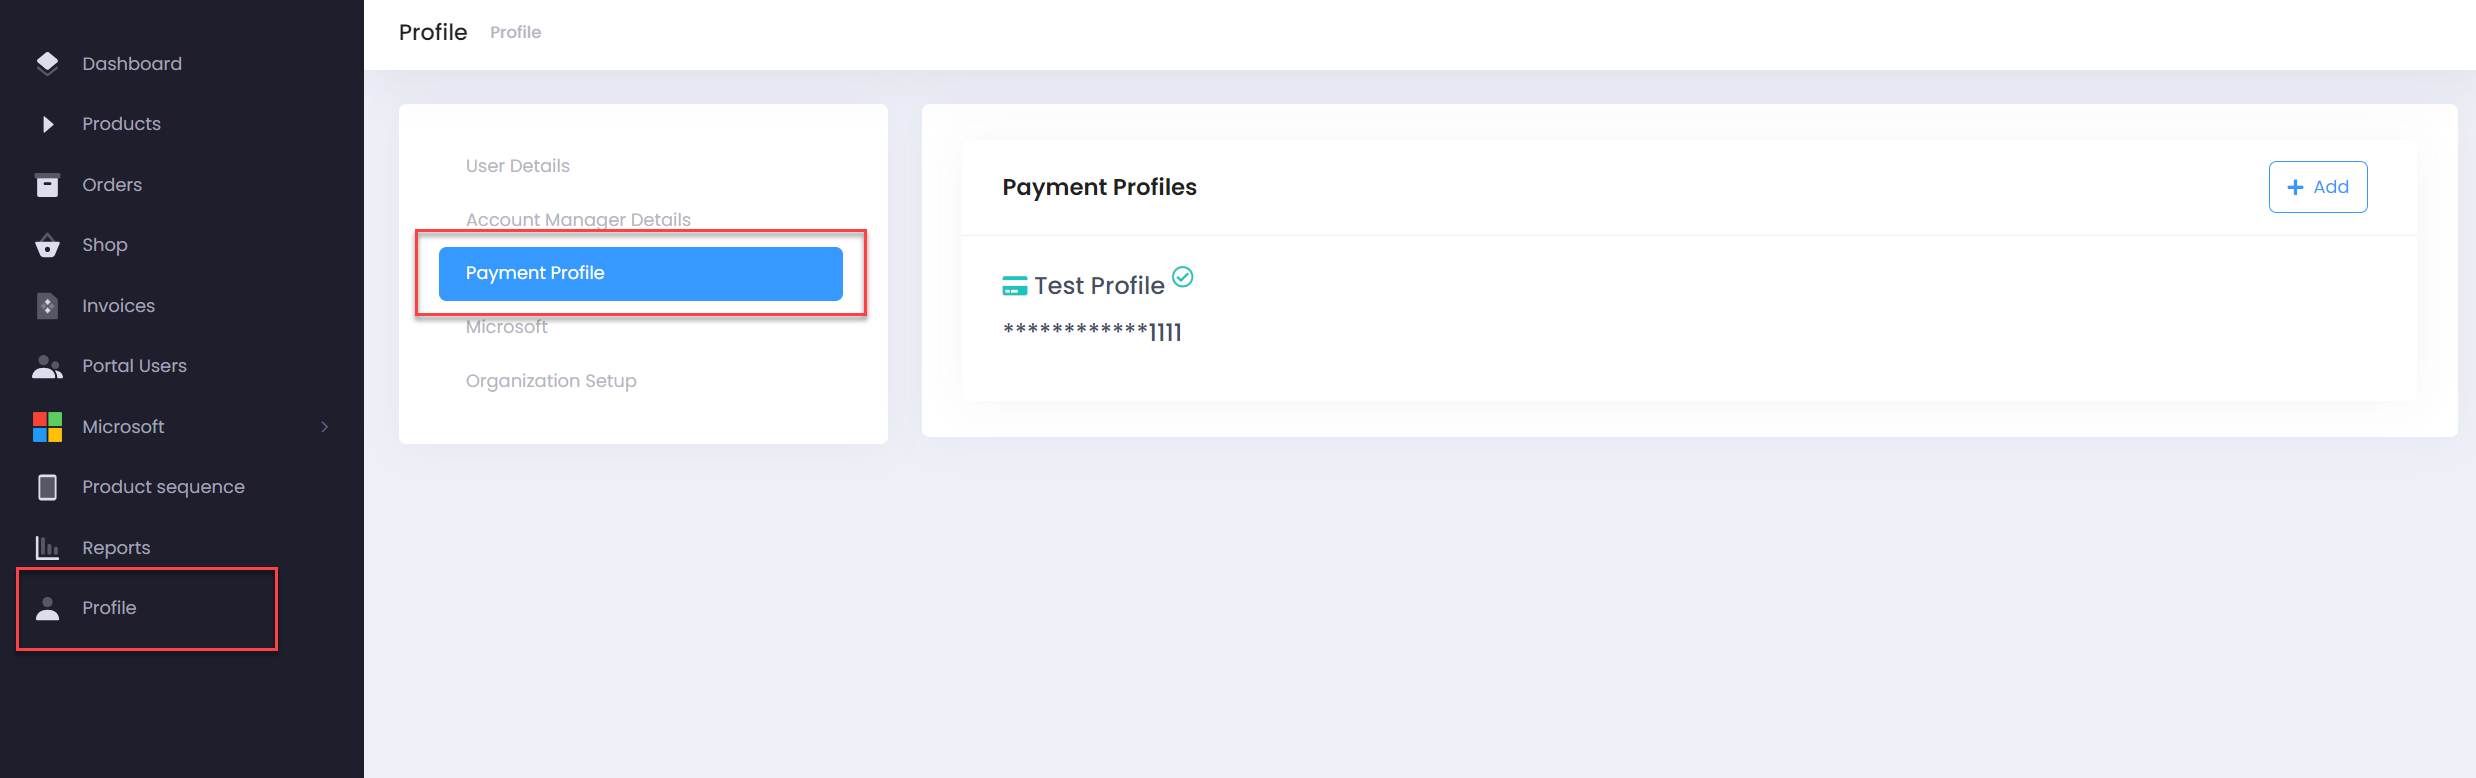
-
Payment method details can be updated by clicking on Add button and providing new details on the form that follows
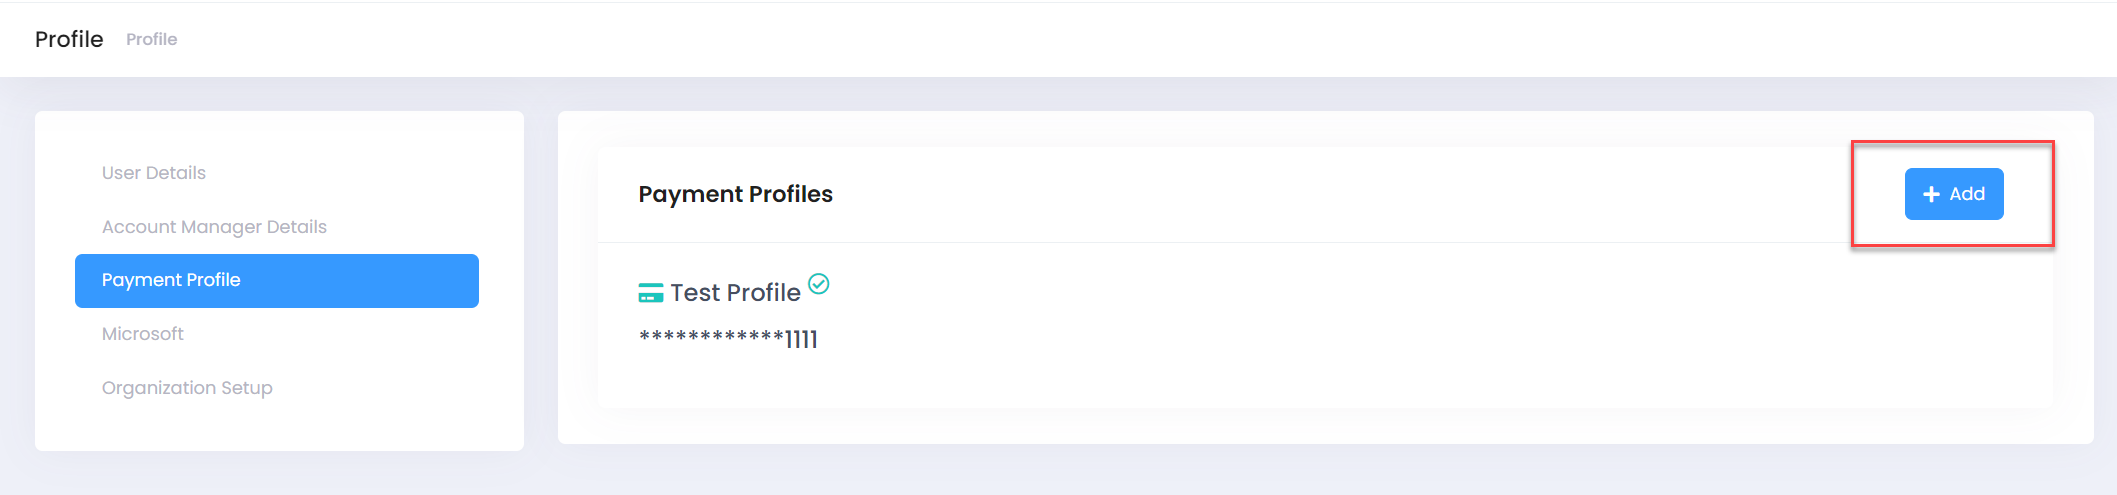
-
Switch back to Partner side by clicking on Stop Impersonation button available on top bar.
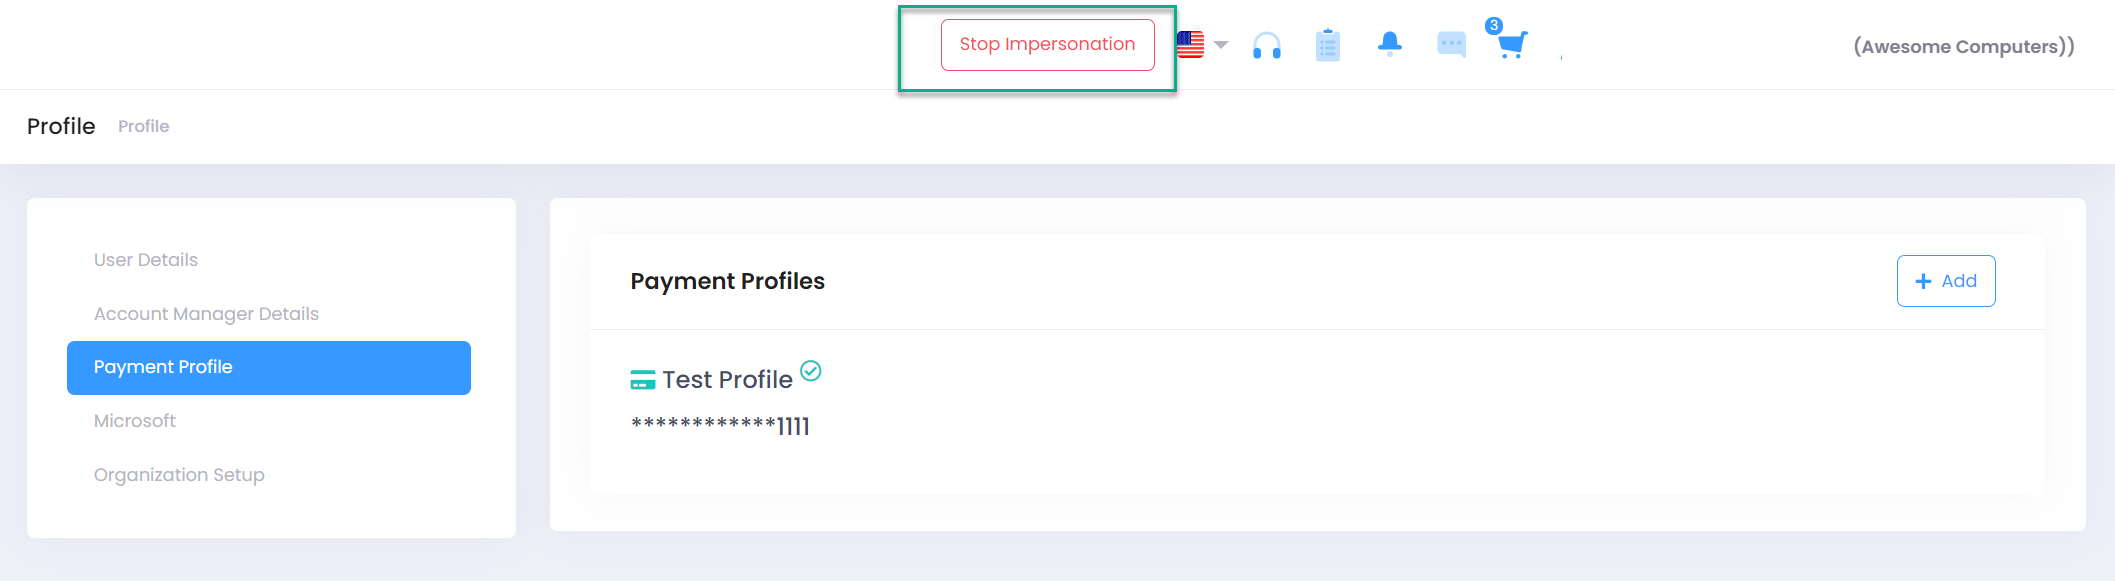
-
Under Customer Settings, select the “Customer Payments” option.
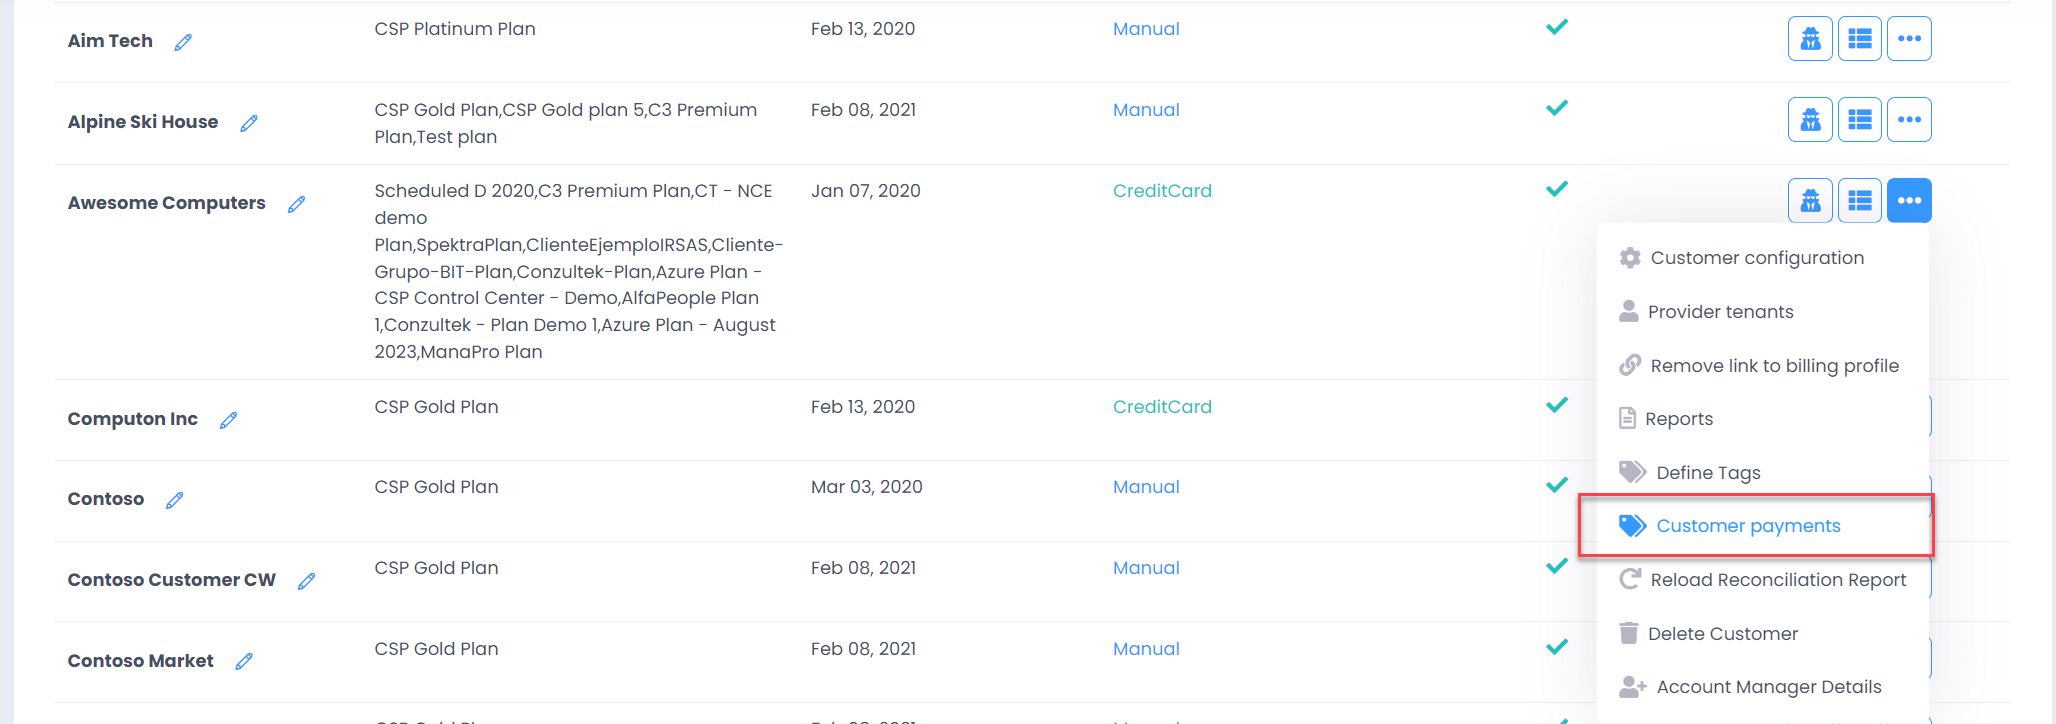
-
Click the “Test Charge Button” to initiate a test charge of $1 against customer payment profile
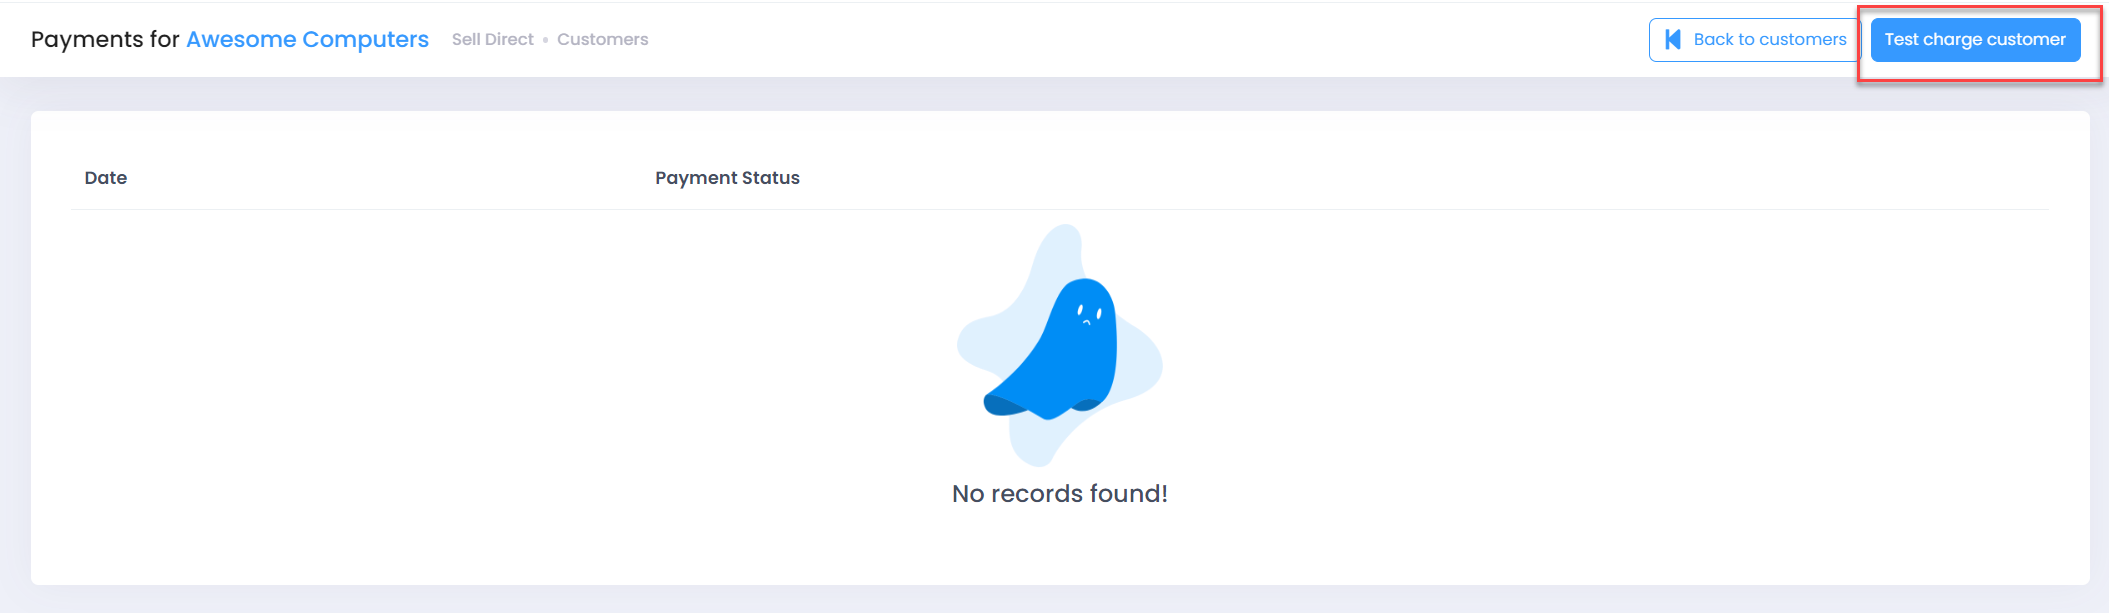
-
Give it a couple of minutes and come back to this screen to view the status of the transaction