Configure C3 for Xero (OAuth2.0)
Overview
The purpose of this document is to explain the steps involved in integrating Xero (with Oauth2.0) with C3. The document talks about how Partners can capture the required information from Xero and submit them to C3 portal to establish C3-Xero connectivity followed by the process of posting invoices to Xero from C3 without having to install any additional components or intervention from C3 support.
Prerequisites
It is assumed that you have an account with Xero with adequate permissions to create / update configuration in Xero as explained in the sections that follow.
Configure Xero App
C3 requires the Xero App Client Id and Client Secret for the integration to work properly. Please follow the steps to get the Client Id and Secret from Xero
-
Navigate to https://developer.xero.com/
-
Login with your Xero account credentials.
-
Click on My Apps.

-
It will navigate you to My Apps view. Click on Create new app.
- App name Example: C3-App
- Company or Application URL. This the URL to your C3 portal Example: [https://contoso.cspcontrolcenter.net]
- Privacy URL(Optional)
- OAuth 2.0 redirect URI This the URL to your C3 portal Example: [https://contoso.cspcontrolcenter.net]
- Accept Terms & Conditions and click on Create app.
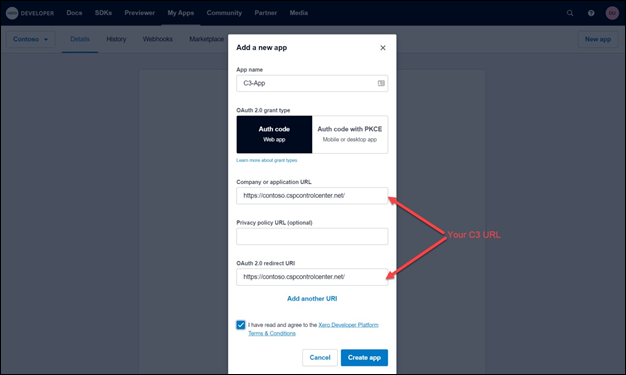
-
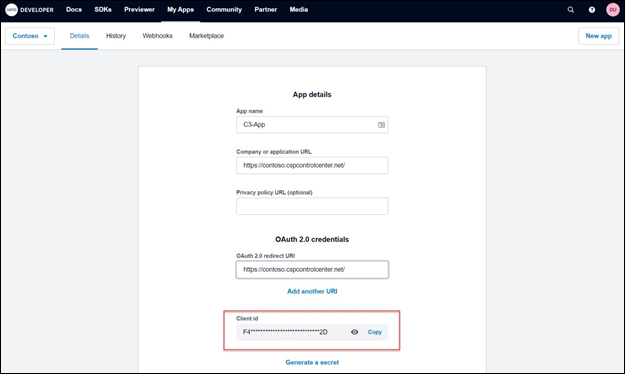
Copy the Client ID detail provided in the screen that follows. Please note that this detail is required to be input in C3 as explained later
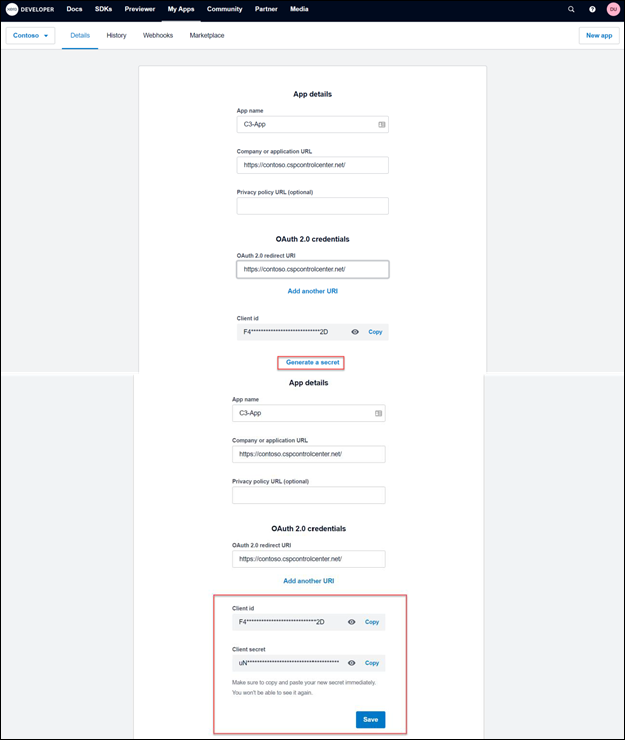
- Click on Generate a secret for a new Client Secret. Please ensure to copy your new secret to a file immediately as this is required to be input in C3. You won't be able to see the secret again.
- Take a note of invoice theme name that you wish to apply to invoices while posting them from C3 to Xero. Refer to instructions below
-
Navigate to [https://go.xero.com] and login using your Xero account credentials
-
Page shows you list of organizations created by you, select desired Organization and click on Settings
-
Click on Invoice Settings available under Feature section of Organization Settings and grab Theme name from the page that follows. (highlighted one for example)
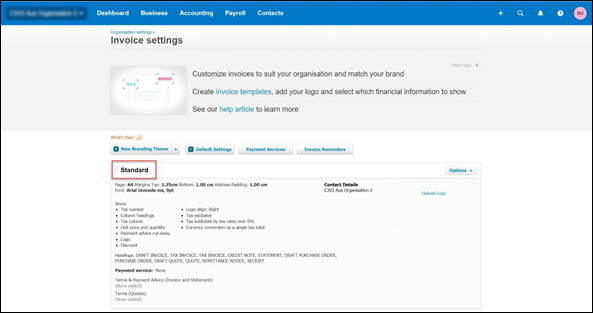
- Grab the Xero account code that gets applied to invoice line items while posting them to Xero from C3. Follow the instructions
-
Navigate to [https://go.xero.com] and login using your Xero account credentials
-
Click on Chart of Accounts available under Accounting Section and grab code for following type of offers SKUs
* License based SKUs
* Azure Usage based SKUs
* Custom offer SKUs
Provide Xero details in C3
• Login to C3 and navigate to Settings -> General
• Provide the Client ID, secret, Account Codes and the Theme that were captured from Xero
• Click Save to confirm and save your changes
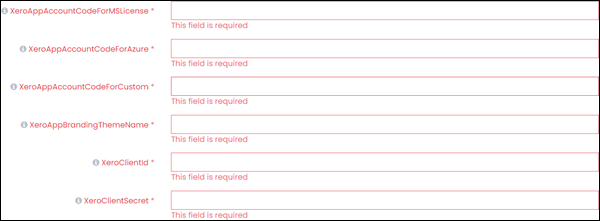
Connecting Xero with C3 and posting invoices to Xero
-
Login to C3, go to Analyze >>Business>>Download Invoice/Payments.

-
Follow the instructions provided on this page to connect C3 with your Xero app.
Clicking on link mentioned in the instruction will take you to another page where you will be asked to select an organization that you want to connect with C3 and provide the consent.
- Once connectivity is established, close the window and come back to the tab that lists the invoices for the selected billing period
• Select the billing period for which you want to see the invoices.
• Select invoices and click on UPLOAD TO XERO to start posting the invoices to Xero
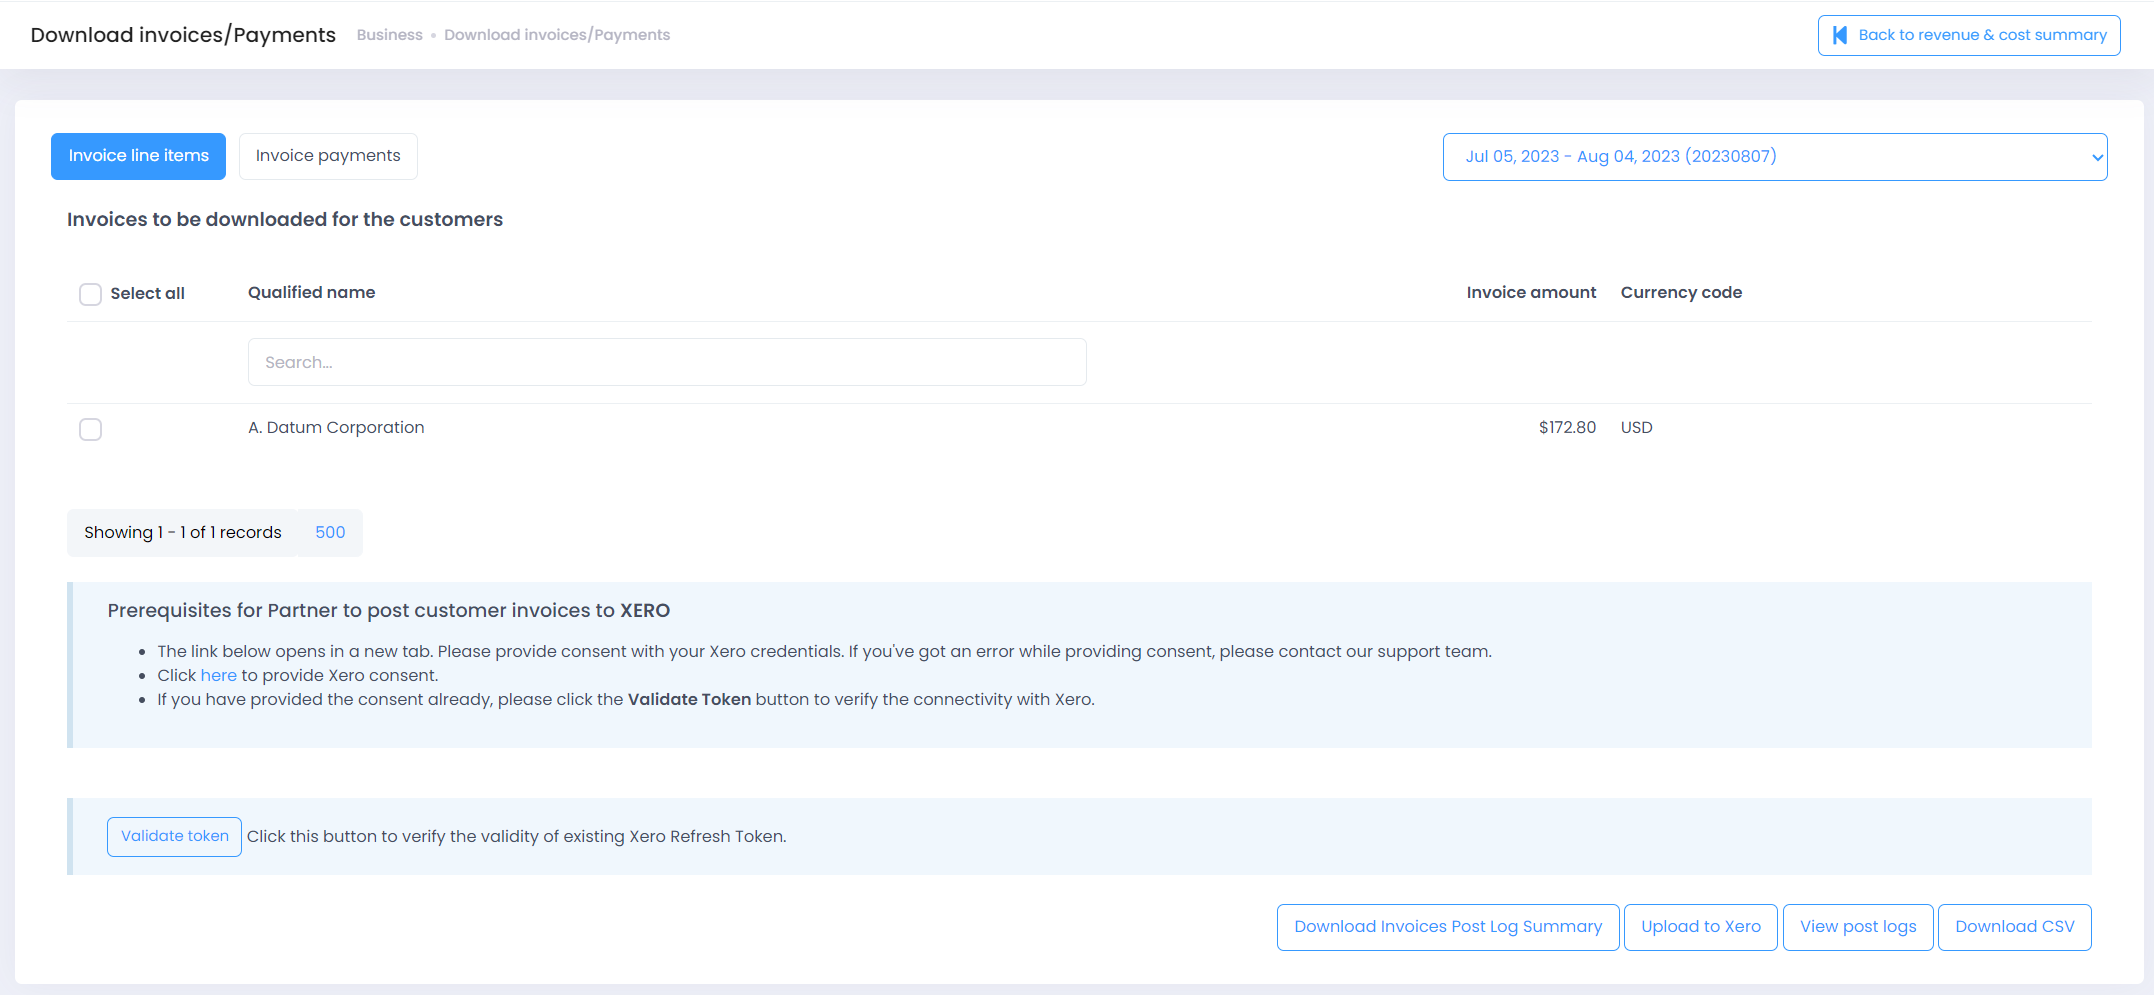
• Click on VIEW POST LOGS to see the status of the process
For any questions or concerns, please drop us a line at [support@spektrasystems.com] .