OverView
C3-ConnectWise Manage is a unique integration designed to reform how subscriptions and customer invoices are manually managed within the C3 platform. Information related to subscription (new or existing) are locally maintained in C3 and ConnectWise uses the data to generate customer invoices for the target customer Agreement. With ConnectWise, subscriptions purchased in C3 can be billed automatically, with a detailed invoice that is generated with the changes made in the subscriptions.
Configuring ConnectWise Manage in C3
Partner Configuration
To start using ConnectWise, you will need to set it up first. Follow the steps below to configure.
1. Click on the Settings (Gear icon).
2. Click on ConnectWise Manage
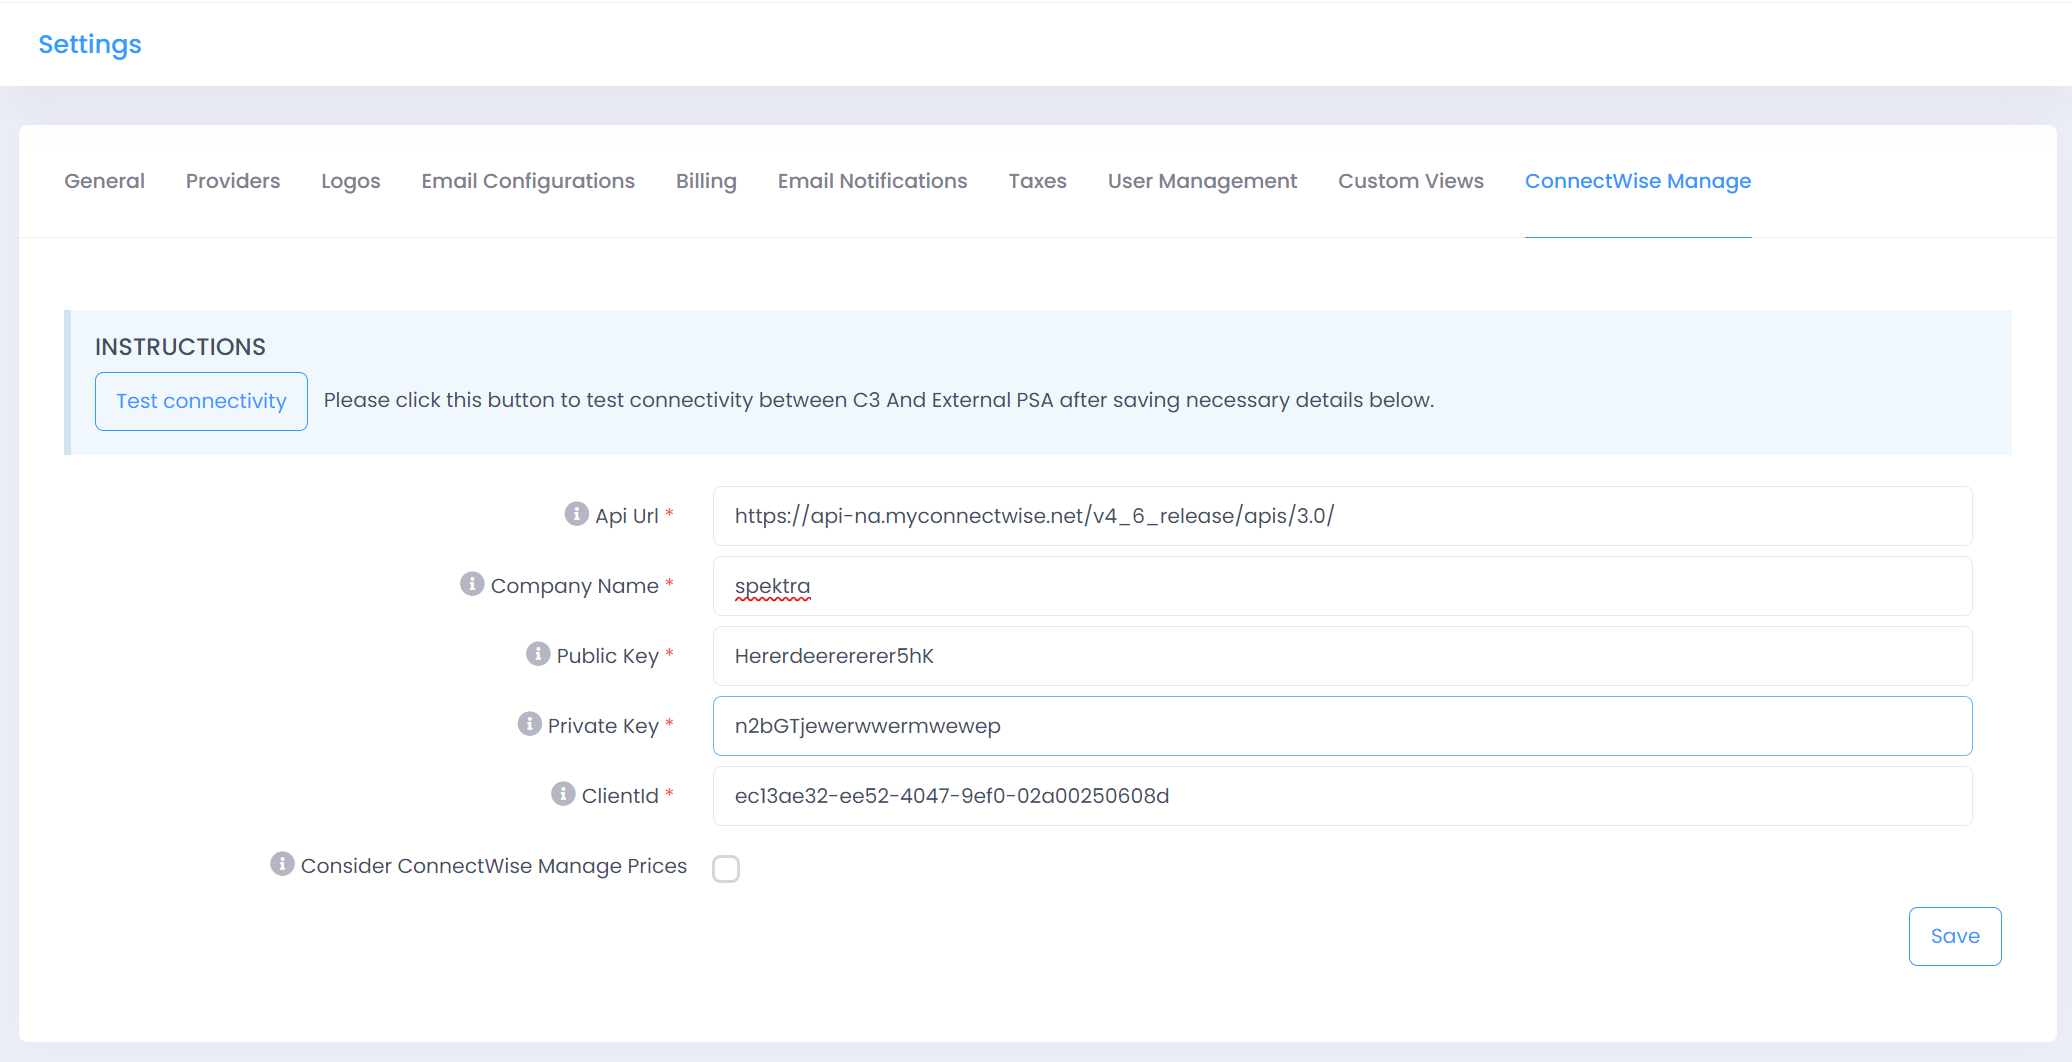
For C3 to access the partner’s ConnectWise account the following information is mandatory.
- CompanyName
- Public Key
- Private Key
- Client ID
- Consider ConnectWise Price
- CompanyName, Public Key, Private Key and Client ID can be obtained from ConnectWise and is essentials for ensuring the connectivity between C3 and ConnectWise.
- Consider ConnectWise Prices is an optional field that partners can check to consider the ConnectWise product prices instead of C3 product process while posting from C3 to ConnectWise.
ConnectWise Manage Keys
Company Name: CompanyName/CompanyId is an autogenerated value given at the time of environment creation. You can acquire this from the ConnectWise Support.
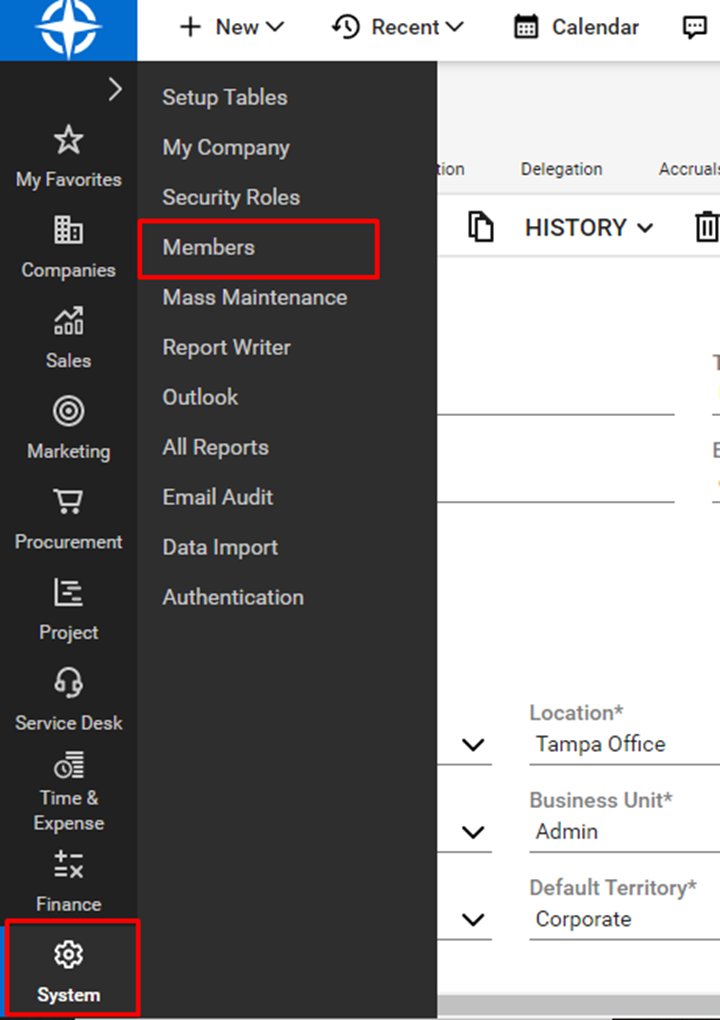
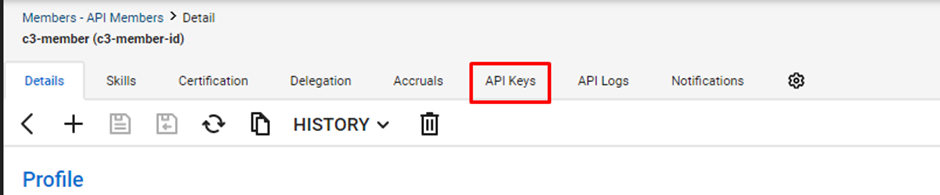
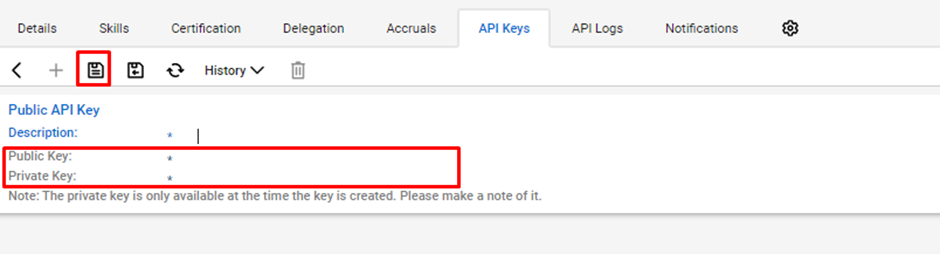
Public Key & Private Key: Follow these steps to acquire Public and private keys from ConnectWise:
-
Click on Systems from the left menu bar and click on Members
-
Click on API Keys and click on the + icon.
-
After providing a description, click on save. This will generate the Public and Private key; remember to save those Keys as the Private key will only be visible once.
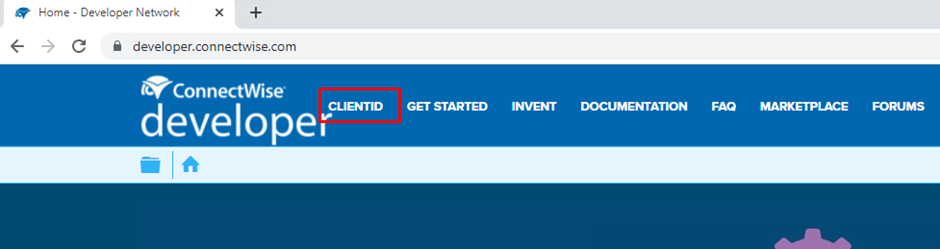
ClientId:
URL: https://developer.connectwise.com/
After login to the above URL follow the below steps:
-
Click on the CLIENTID as highlighted below.
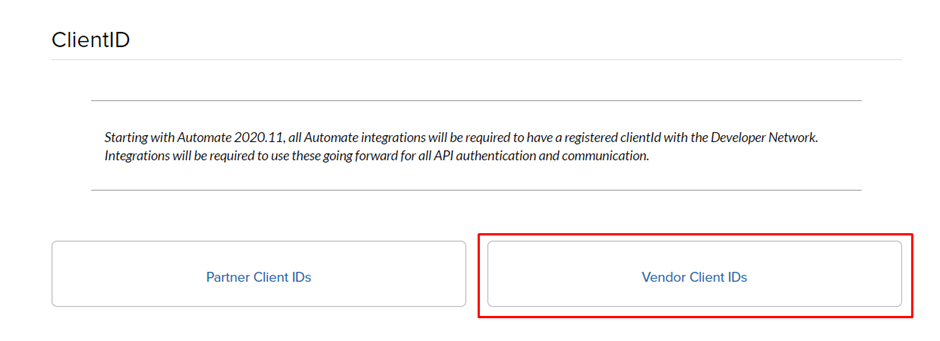
-
Click on the Vendor Client IDs
-
Create a new clientId by clicking the Create New Integration Button.
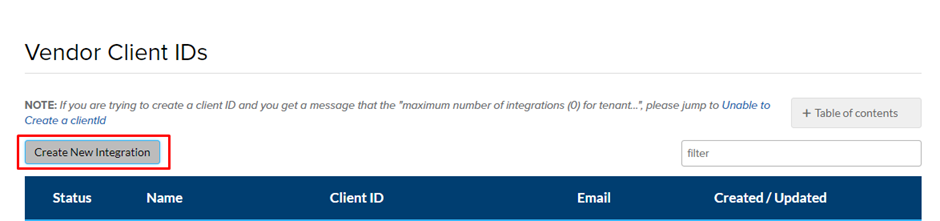
Select the below details as follows:
-
Integration Type: Public
-
Are you a Contractor: true
-
Product: Manage
-
Rest of the details can be filled in any manner.
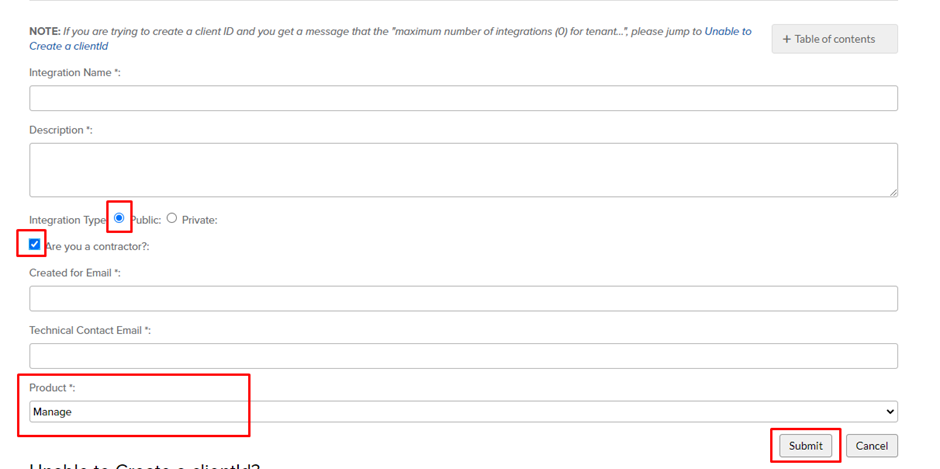
After generation, ClientId will be listed under the Integration Name provided.
Manual Mapping
For C3, to push the product history (Record of changes in the product) data to ConnectWise, product mapping is essential. Follow these steps to configure Manual Mapping
1. Click on Business under Analyze category.
2. Under on Subscription history tab, click on Product Mapping
Mappings
- Customer Mapping:
- Select a C3 customer from the dropdown for further mapping.
- External Customer Mapping:
- Select a ConnectWise customer from the dropdown to map to C3 Customer.
- Agreement Mapping:
- Select an agreement from the dropdown to map the products to that agreement.
- Products will be listed based on the billing cycle of the Agreement.
- Product Mapping:
- Select a ConnectWise Product from the dropdown to map to C3 Products.
Restrictions
- C3 customers are restricted to the corresponding ConnectWise customers only and vice versa.
- Agreement with only Monthly and Yearly billing cycle is shown, other billing cycles are not supported by C3.
- C3 products are also exclusive to the corresponding ConnectWise product.
- One product can only be mapped to one Agreement.
- C3 Products will be listed based on the billing cycle of the agreement.
Best Practices
- Map 1 C3 customer with 1 ConnectWise Customer.
- The same product in C3 with a different billing cycle should be mapped with different ConnectWise Products.
It is assumed that you already have Customers, Agreements and Products Created and available for mapping.
C3 does not create any of the above, it needs to be created by the partner accordingly.
Releasing Product Mapping
For releasing the existing mapping of Product, Agreement and Customer click on the corresponding button as highlighted below.
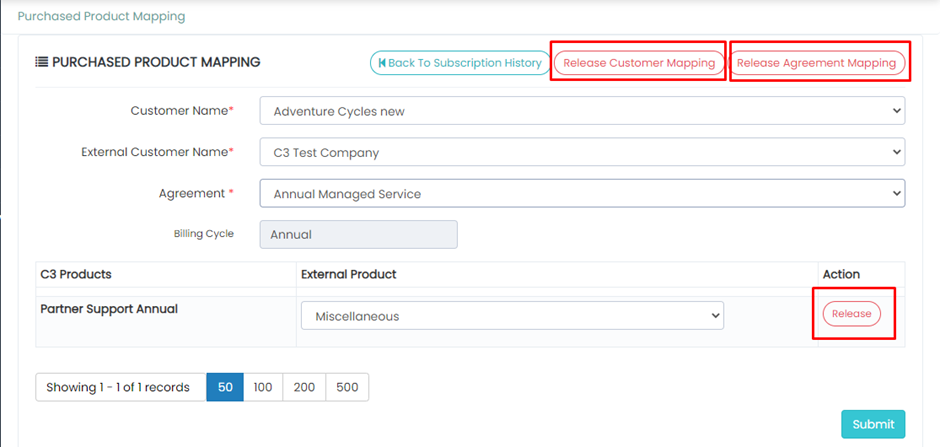
Once you have successfully mapped the C3 Products with ConnectWise Products. Selecting the same set of Customer and Agreement will get you this view with release options.
Release:
- Product Release: By clicking the Release Button under the action column will release the mapping for that product and will be available for remapping.
- Agreement Release: By clicking the Release Agreement Mapping button on top right corner will release all the mapped products under that agreement and the agreement itself will be released too.
- Customer release: By clicking the Release Customer Mapping button on top right corner will release all the mapped products under that agreement, release the agreement mapping and the Customer itself will be released too.
Already mapped older mapping needs to be removed first for the new entities to be mapped. That’s why we have the option for releasing all 3 (Customer, Agreement and Product) entities.
Upload to ConnectWise Manage
Here are the steps to manually upload to ConnectWise.
- Click on Business under Analyze category.
- Under Subscription history, click on Upload to Connectwise.
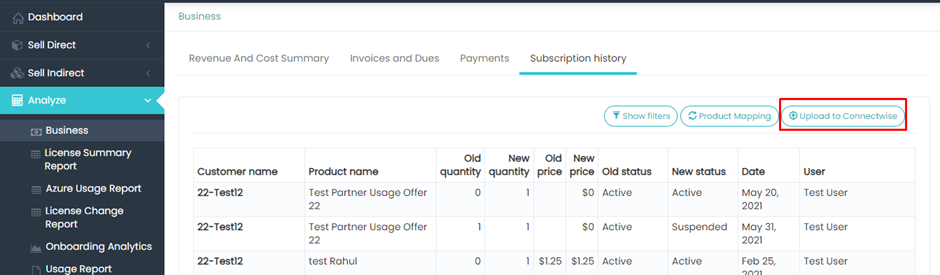
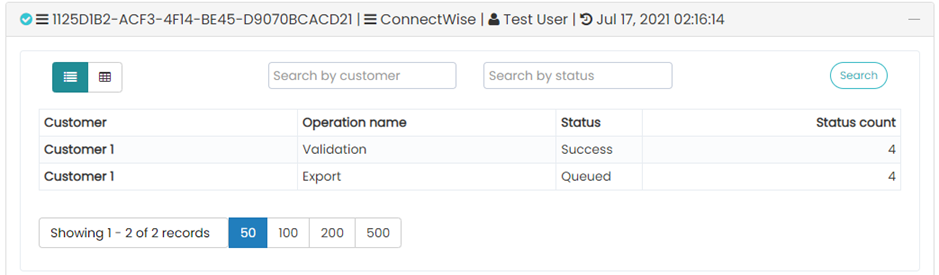
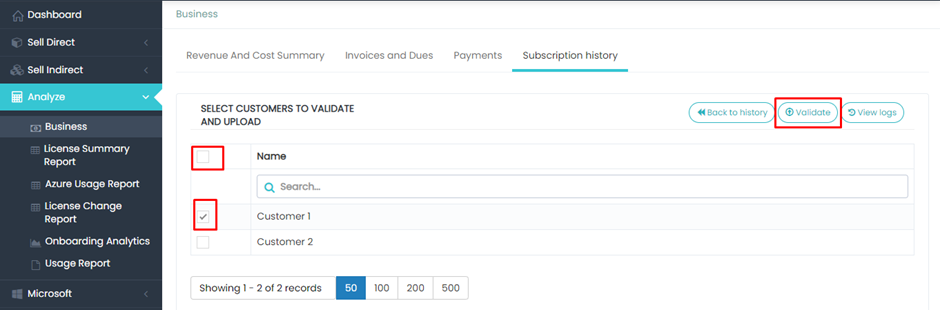
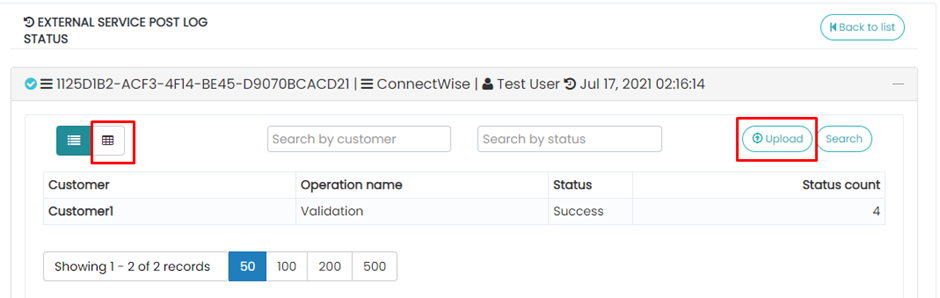
- Clicking the Upload to ConnectWise button will land you on the following screenshot:
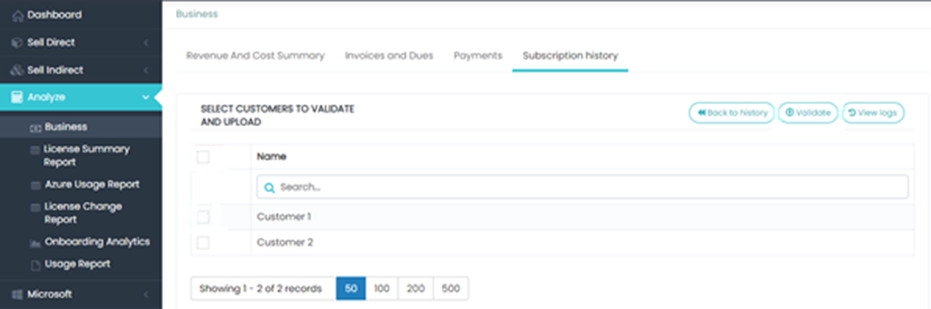
Validate Records:
- Select the Customer individually by clicking the checkbox left to the customer name, or select all by clicking the checkbox on the top left corner of the table.
- After selecting the customer for which data needs to be pushed to ConnectWise, click the Validate button the right-hand top corner as shown in the image below.
- Clicking on the Validate button will land you on the following page.
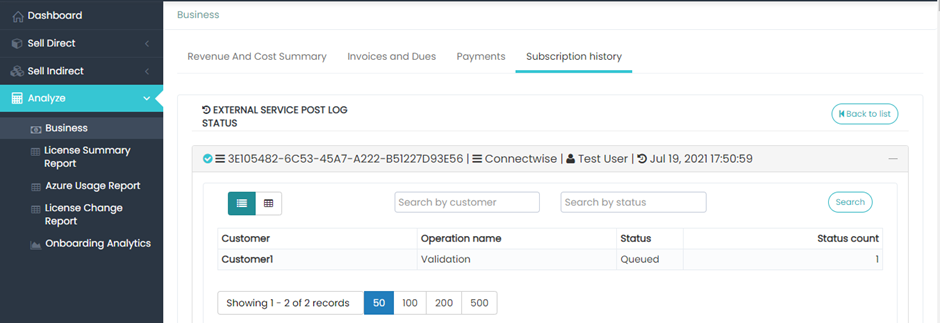
- The status will change to either Success or Error.
For Error :
- In case the system encounters any error, the Status will change to Error as shown below.
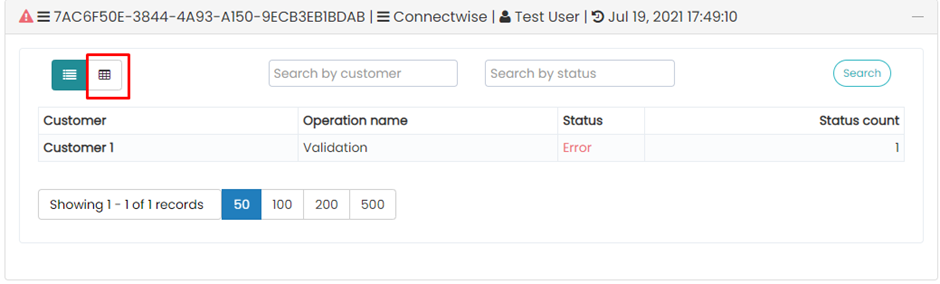
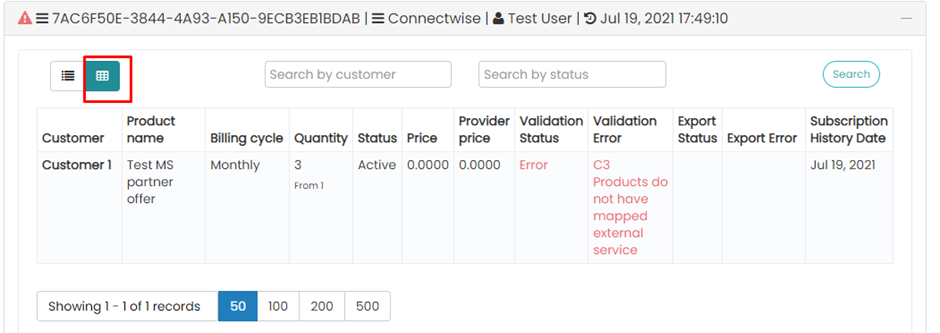
- You can click on the grid button as shown above to check the error details:
For Success:
After successful validation Upload button will be visible.
- Click the Upload button to start the upload of subscription history from C3 to ConnectWise.
- After you click on Upload there will be 1 more record for Export. After the status of Export changes to success, data will be visible in ConnectWise.